Ginger Raspberry Cake

IMG_2985

Do you ever misread directions and make a fantastic discovery?

I have made this cake before and it was always good, but never terrific. Never as good as I wanted it to be. I had the idea of incorporating some ginger into the mix as raspberry, lemon and ginger is an excellent combination that I definitely needed more of in my life. I woke up one morning and decided to just try it. (I have been told that this is not normal behavior. Waking up and randomly baking a cake first thing in the morning just because you want cake. Sometimes other people make no sense to me.) I got the ingredients from the original recipe out and decided to make two small adjustments. I added a little ground ginger to the dry ingredients and then swapped out the 1 1/2 tablespoons of sugar that got scattered on the top for 1 tablespoon of crystallized ginger and 1/2 tablespoon of sugar. (I also added a little kosher salt on top because I always want a little salty in my sweet. That is just how I roll.)

I was a little worried about my raspberries. I had a cup from the farmer’s market, but about half of them had gotten all smushed up. Wouldn’t the cake be prettier if they were whole? The answer there is no, not prettier, the combination of whole raspberries and some swirls of mashed up berries is actually both tasty and beautiful in the finished product. Oh, I also found a way to slightly up the lemon factor. The recipe calls for some lemon zest to be added to the wet ingredients. I took the lemon half that I zested and squeezed it over the berries and tossed them with it just before scattering.

But back to my giant mistake!

As I may have mentioned, it was morning. I was just drinking my first coffee of the day as I made this cake. And I accidentally put an ENTIRE stick of butter in instead of a half stick of butter. Baking is a delicate art. A slight variation on the proportions can ruin the whole thing. The cake looked good enough, but surely it would be too…ummm, nope. It would not be too anything. It would actually be completely delicious. Which means that you can make this cake with anywhere from a half to a whole stick of butter and it will work, it will just land at a different spot on the decadence scale. So, use your own judgment, but man oh man, I am sticking with these proportions. Swooning with every bite.

I am also happy to report that the addition of the ginger is lovely. The swapping out of the topping sugar for crystallized ginger keeps it from being cloyingly sweet and the fact that it is scattered on top means it is not in every single bite, so it comes and goes, there and gone and back again, which is very pleasant. Also, I think squeezing the lemon juice over the raspberries before scattering them gives them a nice little punch. Oh my, this is such a good cake. Such an easy cake. Excuse me. I have to invite some friends over before I eat this whole cake.

Ginger Raspberry Cake
(adapted from Raspberry Buttermilk Cake by Smitten Kitchen)

1 cup all-purpose flour
1/2 teaspoon baking powder
1/2 teaspoon baking soda
1/4 teaspoon salt
1/4 teaspoon ground ginger
1/2 stick to 1 stick unsalted butter, softened (at your discretion)
2/3 cup plus 1/2 tablespoon granulated sugar, divided
1/2 teaspoon vanilla bean paste
1/2 teaspoon finely grated lemon zest (about 1/2 a lemon)
1 large egg
1/2 cup well-shaken buttermilk
1 cup fresh raspberries
Squeeze of fresh lemon juice
1 tablespoon crystallized ginger, finely chopped
1/4 teaspoon kosher salt

Preheat oven to 400°F with rack in middle. Butter and flour a 9-inch round cake pan.

Whisk together flour, baking powder, baking soda, salt, and ground ginger and set aside.

In the bowl of a standing mixer, beat butter and 2/3 cup sugar on high speed until pale and fluffy, then beat in vanilla and zest. Add egg and beat into well incorporated.

On low speed, mix in flour mixture in three batches, alternating with buttermilk, beginning and ending with flour, until just combined. Spread batter evenly into cake pan.

Squeeze lemon juice (use the lemon half that you zested) over raspberries and then scatter raspberries evenly over top. Sprinkle with crystallized ginger, remaining 1/2 tablespoon sugar, and kosher salt.

Bake until cake is golden and a tester inserted into center comes out clean, about 20 minutes. Cool in pan 10 minutes, then turn out onto a rack and cool to warm, 10 to 15 minutes more. Invert onto a plate and serve warm. Will keep at room temperature for several days, or longer in the fridge.

Advertisement

White Bean Dip

Sometimes I am surprised to discover that I have a strong opinion about something. Like guacamole. I never really thought that I had strong feelings about guacamole until recently when a friend said that they had encountered a dip that was made of peas instead of avocados and declared to be guacamole. I was outraged. Really and truly furious and I am quite tickled by the depth of that fury. Like a natural talent for a certain instrument that is never known because that specific instrument never lands in your hands, some opinions must be floating around our cortex, unformed because they have never been called upon, and then suddenly one day someone says that a pea dip is guacamole and that is OUTRAGEOUS on a level that you never could have anticipated.

I had a similar reaction the first time that someone referred to this white bean dip as hummus. But then I realized that I had no other moniker to assign to this dip. It is just white bean dip. That being said, it is a superlative white bean dip. It is the first thing that I think of when I need to make an appetizer or a snack for a crowd. Served with some pita chips or chopped vegetables, it is delicious.

This is an endlessly versatile dip. The core of it is pureed white beans with fresh herbs. But the herbs can be mixed up and other things thrown in. There are also lots of shortcuts and lots of ways to spruce it up with a little extra effort. So, here I give you two versions of the dip preparation: the good version and the better one.

The White Beans
Good – Buy two cans of cannelini beans. Drain and rinse the beans in a colander. Add them to food processor and puree until smooth.
Better – Take 3/4 cup (6 oz.) of dried white beans* and soak them overnight. Drain and put them in a pot with one bay leaf. Cover with water (plenty of water, a few inches over the beans) and bring to a gentle boil. Simmer for 1 to 2 hours until cooked. (Time depends on the beans.) Reserve 1/4 cup of the cooking liquid and discard the bay leaf. Drain the beans and cool until beans can be handled. Add the beans and cooking liquid to the bowl of a food processor.

The Other Flavors
Good – Mince one tablespoon fresh flat leaf parsley and two tablespoons fresh dill. Add the herbs to the food processor with the beans along with one tablespoon good olive oil, the juice of half a lemon, and garlic (see below). Puree until smooth. Taste and add salt and fresh ground pepper to taste.
Better – In addition to the above, mince one teaspoon of fresh rosemary and zest the lemon half. Mix them into the tablespoon of olive oil and let sit for 20 minutes or so. Once the flavors have been absorbed to the oil, add the whole mix to the food processor along with the other ingredients. Taste and add salt and fresh ground pepper to taste with a pinch of smoked paprika or a dried red chile powder.

Garlic**
Good – Mince two cloves of garlic.
Better – Take two unpeeled cloves of garlic. Place them on a small piece of foil, drizzle with olive oil and a pinch of salt and pepper. Seal the foil tightly and roast at 350 degrees for 20 minutes. (Recommend setting foil packet in a pan so that if it leaks, you do not get oil on the floor of your oven. You can also do a whole head of garlic if you want to have extra roasted garlic around.  Trim the bottom off a whole clove, drizzle with oil, wrap in foil and roast at 400 degrees for 30 minutes.) Let the garlic cool until it can be handled, then mince two roasted cloves.

* If using dried beans, use any white bean. Cannelini are good but so are great northern beans. I dream of splurging on Haricot Tarbais beans and making this one day.

** There is a third option here, which is to use a spoonful of that garlic mojo which appeared on this blog a few weeks ago.

Grilled Steak Sandwich with Caramelized Onions and Arugula

You know you have a good sandwich when you give it to six different people and they all eat it exactly as given. No one adds more of something or takes something off. Everyone just consumes it. That is a good sandwich.

Some of my favorite people gathered at my place for the Fourth of July to eat a bunch of food and play croquet before we went to the beach to enjoy some mildly dangerous fireworks. The centerpiece of the lunch was this sandwich, though if I have time this week I may do a few additional posts with more of the menu items because there were quite a few stellar things that I want to share.

This is a deceptively simple sandwich. It has very few components and so you might think that I have very little to tell you about putting it together but you would be wrong. I am going to overload you with details on those individual components because they include two of my very favorite things in all the land — grilled steak and caramelized onions.

Let’s start with the steak. You are going to want to make this steak on a charcoal grill. (Pause to admit horrible bias for charcoal grills and against gas grills and that is never changing because charcoal is just better.) You can do all sorts of things on a grill, but my favorite thing will forever remain taking a good quality steak and cooking it to a perfect medium rare. A simple thing and yet there are myriad ways to screw it up. After having grilled dozens and dozens of steaks, I have some very strong opinions on how to grill a steak.

Season simply and season early. Kosher salt and pepper is all that I ever use to season my steaks. Marinades and complicated spice rubs are for when you are working with tougher cuts. With a good tenderloin, you do not need all the bells and whistles. I place a rack (the kind that you would cool cookies on) over a baking sheet and lay my steaks out on it. I season them generously with kosher salt and fresh ground pepper on both sides and then place the sheet uncovered in the fridge for at least four hours, but overnight is preferable. The combination of the rack and the salt does double duty in drying out the exterior of the steak and drawing all the moisture towards the center, which helps you achieve that nice brown crust and luscious pink center.

Bring to room temperature before cooking. Remove your steaks for the fridge about an hour before cooking. Some people say fifteen minutes is plenty of time to get the steaks to room temperature. The truth is that it takes multiple hours but I usually have too much going on in the kitchen and find that one hour gets the job done well enough.

Go indirect heat or go really high heat. Indirect heat is terrific for cooking steak. You bank all your coals on one side and cook your steaks on the grill over the opposite side. This method of cooking steak requires a lot of attention. It takes a little longer due to the lower temperature and the cooler side of the grill will not have an even surface temperature so the edges of your steak nearer to the banked coals will be getting more heat. You have to flip the steaks multiple times to ensure that the cook and brown evenly but the steaks do cook more gently and so you have a thinner brown crust and more lovely pink meat. I cannot deny that it is worth the time for the perfectly cooked result. However, I often find it an impractical way of cooking since I usually have other things that I am grilling that require direct heat and switching from a direct to indirect setup is just a huge pain and not terribly effective. So, take a good look at your menu and decide whether you want to spend as much time hovering over the grill as you will need to for indirect cooking. For this specific occasion, I used high direct heat and it all worked fine. When cooking with high heat, you get a very even brown but you have to be very vigilant so you do not overcook the meat. I set a timer for three minutes and then flip and set a timer for three minutes again. (The steaks may require another minute or two, but with high heat, always err on the lower side of your cooking time when setting a timer.) Keep your thermometer handy and remove the steaks as soon as they hit 135 degrees. Not a moment longer. The high heat results in a thicker brown crust but you should still have a lovely piece of meat as long as you rest it properly. Speaking of which…

Rest is critical. In grilling as in life. What does resting the meat mean exactly? It means you let it sit there for fifteen minutes without cutting into it. This is so important. Many a steak has been ruined because someone took a knife and made a small slice to check to see if it was done. This is the worst way to check to see if a piece of meat is done. When a steak (or indeed any meat) is cooking, the juices are all drawn towards the exterior. The nice brown sear is keeping them contained. When the meat rests, the juices are reabsorbed into the meat. If you do not let a steak rest properly, juice will run everywhere when you cut it because the juice is still concentrated just at the surface. You lose all the juice that should be in the steak onto the cutting board. Also, the meat continues to cook as it rests. 135 degrees is not the final temperature of the steak you are eating. In fifteen minutes of rest, the internal temperature will go up another 10 degrees or so.

End of my brief steak tutorial and on to the onions.

Caramelized onions are another of my favorite things. They are also something that I do not make that often because they take a lot of time. You are looking at about 90 minutes from start to finish. You won’t be hovering over them. They are not labor intensive. However, I recognize that some people might think that it is too big a time commitment for what could be dismissed as a condiment. If you want to cut down the prep time for this sandwich, you could simply grill your onions. But I will think less of you. Know that.

My favorite recipe for caramelized onions is based on Deborah Madison’s recipe. I make two significant swaps. Her onions slow cook in white wine. I use vegetable stock. She finishes her onions with sherry vinegar. I use red wine vinegar. Neither of these are drastic changes. The end result is still the silkiest, brownest, tastiest caramelized onions I have ever had.

I served this sandwich on lightly toasted pretzel bread with mayo and stone ground mustard and some arugula. (The combination of ingredients came from Smitten Kitchen though I executed this basic idea in a completely different way. She grilled her onions. Let’s not talk about it.) Everything balances perfectly here. The bitterness of the arugula balances out the intense sweetness of the onions. Mayo and mustard provide nice base notes. You can use another bread (I am sure a toasted french roll would also be nice) though I quite liked the pretzel here.

Grilled Steak Sandwich with Caramelized Onions and Arugula
(adapted from Smitten Kitchen)

2 New York Strip Loin Steaks (about 10 oz each)
Kosher salt and pepper
1/2 cup caramelized onions (see recipe below)
2 handfuls arugula
6 pretzel rolls
Mayonnaise
Stone Ground Mustard

At least four hours (and up to twelve hours) before you will be grilling the steaks, season generously with kosher salt and pepper and place on a wire rack over a baking sheet. Place uncovered in the fridge. Remove the steaks from fridge one hour before you intend to grill them. (Leave them on the wire racks.)

Light your charcoal and bring it to high heat with coals evenly spread in the grill. Grill the steaks for three to five minutes on each side until an instant read thermometer reads 135 degrees. Let the steaks rest for fifteen minutes and then slice thinly.

Toast the bread on the grill. (Toasting bread on a hot grill takes seconds. If you put six pieces of bread on the grill, by the time you have placed the sixth piece, it is time to take the first one off.)

Spread mayo on the top side of the bun and mustard on the bottom. Lay the arugula and onions on the mayo bun and the steak on the mustard bun. Combine and devour.

NOTE: Since I was making this for a crowd, I used pretzel sausage rolls (buns designed for hot dogs rather than burgers) and halved them so everyone had a small sandwich and there were enough for folks to go back from seconds. On celebratory days, it is nice to be able to go back for seconds so I tried to portion things out to make that easier. The size was great and I would highly recommend it.

Caramelized Onions
(adapted from Deborah Madison)

2 tablespoons butter
3 lbs. white onions, sliced 1/4 inch thick
4 sprigs of thyme
1 1/4 teaspoons sea salt
1 cup vegetable stock
1 tablespoon red wine vinegar

Melt the butter over medium high heat and add the onions and thyme. Cook for about five minutes until the onions soften, stirring frequently. Add the salt and lower the heat. Cover and cook for twenty minutes. Add the stock and cover and cook for an hour, stirring every twenty minutes or so. When the onions are richly browned, turn off the heat and discard the thyme sprigs. (Most of the leaves will have come off the stems.) Stir in the vinegar. (Onions can be stored in the fridge for a few days but reheat over low heat on the stove before using.)

Ode to Alice Waters’ Ratatouille

IMG_2808

I love summer. I did not always love summer. Growing up in California, I was fairly indifferent to it. When you live in a place where people wear shorts and flip flops in January, seasons seem like arbitrary distinctions. But nothing clarifies like contrast and the juxtaposition of winter and summer in the Midwest has given me a greater appreciation of a simple sunny day than I ever thought possible.

Summer here in the city means more than just the sun. It also means that every day of the week, somewhere in the city, there is a farmer’s market. All summer long, I turn corners and am greeted with fresh bread, good cheese, and rows and rows of vegetables. My favorite thing to do in the summer is to come home with a bag full of pretty things and make something that I could never make without really fresh ingredients. Like this ratatouille.

This is Alice Waters’ Ratatouille and if you aren’t familiar with Alice Waters, you should check her out. (When I want to cook vegetables, I trust two people above all others – Alice Waters and Deborah Madison. Go and seek out their books and learn. They are masters of all things veggie.) Alice’s recipe here is really straight forward. An equal amount of all the vegetables. Simple clean flavors. Everything gets cooked in one pot (though you will need a number of prep bowls for all the veggies). The eggplant gets some special attention at the start, which it needs because eggplant cooks differently than everything else in this dish, but the final result is nothing short of spectacular.

You salt the eggplant and let it drain before cooking it. This process draws the excess moisture out of the eggplant and prevents it from becoming too soggy when cooked. The technical name for it is “degorging”, which can be added to the pantheon of dirty sounding things that are done in the kitchen. Grinding, pounding, shucking, sweating, rubbing, whipping. The kitchen can be a pervy sounding place sometimes. It is important to acknowledge this and giggle about it a little. The minute you take the kitchen too seriously, your food becomes joyless.

Once the eggplant is degorged (hehe), you lightly fry it (over medium heat, be sure not to bring the heat up too high) and then set it aside while you soften the other vegetables. Starting with the onion, then adding the garlic and basil along with some dried chile flakes (or crushed red pepper). The tiny hint of heat from the chile here is what makes the sauce bowl licking good in my opinion. The remaining veggies get added in a specific order — peppers then squash then tomatoes — so that the ones that take the longest to soften (the peppers) get the most time in the pan. The eggplant gets added back in for the last 10 minutes to bring it all together.

This is also an easy recipe to halve, which is what I did. I used one small Chinese eggplant, two small onions, one red bell pepper, a bunch of baby squash, and a handful of large cherry tomatoes. The original recipe called for about 1 pound of each vegetable so halving or doubling it is easy math. I highly recommend eating this with some good quality bread because you will want to eat every last bit of sauce in the bowl. Though there is no shame in licking the bowl clean. Licking the bowl clean is a thing of triumph. Never let anyone tell you different.

Alice Waters’ Ratatouille

1 medium or 2 small eggplants
2 medium or 4 small onions
4 cloves of garlic**
1/2 bunch of basil tied in a bouquet with kitchen twine and 6 basil leaves, finely chopped*
1/8 to 1/4 teaspoon dried chile flakes (to taste)
2 sweet peppers
3 medium summer squash (recommend a mix of yellow and green)
3 medium tomatoes (or about 16 large cherry tomatoes)
Olive oil (at least 5 tablespoons)
Kosher salt***
Flaky sea salt***

First, everything gets chopped into 1/2 inch dice so start with your eggplant. Dice it, then toss it with a teaspoon of kosher salt and set in a colander in the sink to drain while you chop the other veggies. Everything gets added at different times so make sure all the chopped veggies get their own prep bowls.

Once the eggplant has finished draining, heat about two tablespoons of oil over medium heat in a dutch oven or other large heavy bottomed pot. (You never want this pot to get too hot. No sizzling or smoking oil.) Add the eggplant and cook, stirring frequently until it is golden brown, about five minutes. If the eggplant sticks at all, add a little more oil. When the eggplant is cooked, remove from the pot and set aside.

Add two more tablespoons of oil and heat. Then add the onion and cook until soft and translucent, about six to eight minutes. Add the basil bouquet, the garlic and the chile flakes with a generous pinch of the flaky sea salt. Cook for two to three minutes to blend the flavors thoroughly into the oil. Add the peppers and cook for a few minutes, stirring frequently, until the color of the peppers soften. (You are not cooking until the texture softens, there will be plenty of time for that. You just want the color of the pepper to lose its sharpness.) Add the squash and cook for two to three minutes, stirring frequently. Add the tomato and cook for ten minutes, stirring frequently. (It sounds like you stir a lot making this dish, but just remember that stirring frequently does not mean stirring constantly. You just want to make sure that everything gets its turn at the bottom of the pot.) Now add the eggplant and cook for ten to fifteen more minutes until everything softens and gets a little saucy.

Remove the pot from the heat. Take out the basil bouquet, pressing it against the side of the pot to extract any oil. (Do not forget to do this. There is so much flavor soaking in those leaves. You want that.) Taste the dish and add more salt or olive oil to taste. Sprinkle with the finely chopped basil leaves and serve with crusty bread for sopping up all the delicious sauce.

***********

* The basil that I bought was one big bunch still attached at the stem so I picked off a few leaves for the garnish and simply left the rest attached at the stem and put that in without bothering with the twine. (And if you do not have any kitchen twine, you can substitute unwaxed unflavored dental floss for kitchen twine. I was trussing chickens with dental floss for years before I finally bought some twine. The floss always worked great.)

** Anyone who has read some of my previous blog posts knows that I made some garlic mojo (garlic slow cooked in oil with lime juice) not that long ago and have been putting it in everything. This was no exception. I swapped out the fresh garlic for a teaspoon of garlic mojo. I have no regrets. I think if I were making this and I had no garlic mojo on hand, I might still roast the garlic before putting it in because I really liked the softer taste from the garlic mojo here.

*** This is where I am getting fussy. When salting before cooking, I always use the kosher salt. The bigger grain does the best job of drawing out moisture without vanishing. But once the dish is on the stovetop, I use the nice flaky Maldon’s sea salt. It dissolves more cleanly, it has better flavor than your average sea salt, and a little of it goes a long way.

Mango Quinoa Salad with Curry Dressing

This salad will forever be the centerpiece of the best picnic lunch that I ever made.

A few years back, I took a day off work and went to Six Flags amusement park with two of my dearest friends. We were feeling nostalgic and desirous of roller coasters. We packed a lunch (to save money and to spare ourselves the grim amusement park fare) and headed out for a day of joy. But after a few hours, the day was not looking good. It was brutally hot and standing in lines in that heat for the first few hours quickly sapped us of our enthusiasm. By lunchtime, we were wondering if we had made a giant mistake in agreeing to spend an entire day there but none of us wanted to be the one to pull the plug. We dragged ourselves out to the car for the lunch that I stashed in a cooler in the trunk — roast beef and spinach on focaccia, blueberry crumble, and this salad.

It’s amazing what a good meal can do. It can turn a whole day around. We sat under a tree and devoured that meal and then we went back into the park and had a fantastic day. So for me, this salad will always be that moment when a disappointing day suddenly starts looking good again.

My nostalgia aside, this is a seriously good salad and it is perfect for summer. I have given this recipe to several people and there are two things about it that generally give people pause – cooking quinoa and dicing a mango.

If you are one of those people who is afraid of cooking quinoa, don’t be. If you can cook rice, you can cook quinoa. Just like anything that is being cooked in liquid, it is more a matter of learning your stove and your cookware then learning the ingredient. Depending on the size and quality of your saucepan, it will respond differently to heat. The time to get the water to boil and the level of simmer will vary. So keep an eye on it the first few times you make it. You’ll learn quickly that with this pan on that stove, your proper cooking time is actually 13 minutes and then you can set a timer and walk away confident in the perfect quinoa coming your way.

Dicing a mango can be messy business. That big pit at the center is hard to work around and peeling a mango can wind up with you losing a lot of the tasty flesh inside. So the easy answer is…don’t bother working around the pit and do not peel it. Holding the mango with one hand, stand it on its end, stem side down. With a sharp knife in your other hand, cut from the top of the mango, down one side of the pit. Repeat on the other side. You will have three fairly equal size slices of mango — two sides and the center with the pit. Set the center piece aside for now. Take the two slices and, using a smaller paring knife, make lengthwise and widthwise cuts (careful not to cut through the skin) so that you have a grid of squares (about 1/4 to 1/2 inch, depending on how big you want your mango pieces). Depending on the ripeness of your mango, you may be able to pluck off the mango pieces, but if not, you can use the paring knife to slice them off the skin. Then take the center piece of mango, remove the skin and cut pieces from around the pit. (You might not get much mango out of it but if you feel the same way I do about mango, you will take every bit that you can.)

This salad keeps nicely in the fridge for about a week. It will also heartily survive half a day in a cooler in the sweltering heat of a locked trunk and be the perfect lunch. Trust me.

Mango Quinoa Salad with Curry Dressing
(Adapted from Deborah Madison’s Vegetarian Cooking for Everyone)

1 1/3 cups quinoa
1/2 teaspoon salt
2 large mangoes
1 jalapeno chile, seeded and diced
3 scallions, including an inch of greens, thinly sliced
Curry Vinaigrette (recipe below)
1/4 almonds, roasted (optional)

First, make the curry dressing and set aside. (See recipe below)

Thoroughly rinse the quinoa (even if your quinoa box says you do not need to, do it anyways) and then add it to a saucepan with 3 cups of water and the salt. Bring to a boil, then lower to a simmer, cover and cook for about 15 minutes. When the quinoa is done, you should see tiny spirals (the germ) separating from and curling around the quinoa seeds. Drain the quinoa.

While the quinoa is cooking, dice the mangoes and the jalapeno and slice the scallions.

Toss the quinoa with the mangoes, chile, scallions, and vinaigrette. Chop the almonds and add them last so they stay crisp.

Curry Vinaigrette

1 garlic clove
1/4 teaspoon salt
2 tablespoons yogurt or sour cream
2 teaspoons curry powder
Zest from one lemon
1 1/2 tablespoons of lemon juice
5 tablespoons light olive oil
2 tablespoons finely chopped cilantro

Pound or mince garlic and 1/4 teaspoon of salt in a mortar until the form a smooth paste. Combine the garlic and salt with yogurt and curry powder in small bowl. Stir in the lemon juice, then whisk in the oil. Let stand 15 minutes, then stir in cilantro. Taste for tartness and salt and adjust as needed.

BONUS TIP: I was inspired to post this after sending this recipe to a friend who had a mango surplus. She reported back that she highly recommends making the salad in advance as it is so good chilled, tossed with some greens and a little extra dressing. She speaks truth.

White Chocolate Cardamon Cookies

IMG_2726

I had no intention of baking cookies today. I was looking on the Food 52 website for a Spanish omelette recipe and I saw a photo of a chocolate chip cookie. Damn beautiful seductive cookie photo. I clicked on the link just to see what the bones of the recipe were. I have my go-to chocolate chip cookie recipe which I adore and I am not looking to replace, but I always like to see what other people are doing. I started reading the recipe and she said up front that this basic cookie dough can be varied to incorporate other ingredients. She mentioned white chocolate and cardamon. I immediately scrapped all plans for my afternoon. These cookies demanded to be made. And I am glad that I listened because oh the texture and the layers of flavor. So, so good.

I had to go to the store to get turbinado sugar, which I never really bake with. With baking, I always adhere to the original recipe the first time I am making it. Sometimes I will switch it up later, but I always like to see what I am working with first. Also, I was intrigued by this recipe’s demand for three different sugars. What would that look like? It turns out that the three different sugars creamed with the butter resulted in a base that almost looked like a mousse. Even more so when the egg was added. It all came together very quickly. (It did reaffirm my long held love of my kitchen scale. Seriously, baking is so much easier when you are given weights to work with. Not only is the accuracy improved but you are not dirtying measuring cups.)

To be honest, I don’t know why the original baker is pairing dark chocolate chips with this dough. As a base for a standard chocolate chip cookie, it is fine but as the base for this white chocolate and cardamon combination, it is fantastic. The use of the dark brown sugar and the texture resulting from the three sugar combination balances out the often overwhelming creaminess of the white chocolate and the strong smoky cardamon flavor. I was kind of winging it when it came to the amount of cardamon, but I feel good about where I landed. I ground the seeds from eight cardamon pods and that resulted in about 1/2 teaspoon. I had never ground my own cardamon before but I always get excited when I get to break out the mortar and pestle. These seeds grind up very easily. The flavor with freshly ground seeds is so much more subtle but I often think it is not really worth the effort. I liked it here, though I imagine laziness could easily win the day and the cookies would still have a nice flavor.

The original recipe called for the dough to rest in the fridge for 24 hours. This is an excellent thing to do with cookie dough. These natural toffee flavors come out as it rests. For every day you leave it in the fridge, more layers are there. However, sometimes you cannot wait and I am happy to report that these cookies tasted just fabulous after only an hour of resting in the fridge. Caramel undertones and all that creamy white chocolate and the salty finish. Still, I only baked about 1/3 of the dough because I want to have them after the full resting period.

I thought about adding some ginger to the mix with these cookies. I decided not to with the first batch but I still think that’s a pretty good idea. Next time I make them, I will add some finely diced crystallized ginger in with the chocolate chips at the end.

White Chocolate Cardamon Cookies
(Adapted from the Ashley Rodriguez Salted Chocolate Chip Cookie recipe on the Food52 website)

  • Eight cardamon pods*
  • 1 3/4 cups (250 grams) all-purpose flour
  • 3/4 teaspoon baking soda
  • 1/2 teaspoon kosher salt
  • 1/2 cup (115 grams) unsalted butter, at room temperature
  • tablespoons granulated sugar
  • tablespoons turbinado sugar
  • 3/4 cup plus 2 tablespoons (170 grams) packed dark brown sugar
  • egg, at room temperature
  • teaspoon vanilla bean paste
  • ounces (170 grams) white chocolate chips**
  • Flaky sea salt (such as Maldon’s)***

Break apart cardamon pods. Discard shells and grind seeds in a mortar and pestle until you have a fine powder. Measure out and make sure you have a scant 1/2 teaspoon.

In a medium bowl, whisk together flour, baking soda, kosher salt and cardamon.

In the bowl of a standing mixer, combine the butter and sugars and, using a paddle attachment, cream together on medium speed for five minutes until light and fluffy, scraping down the sides of the bowl with a rubber spatula as needed. (Do not cut down this time. Cream for the full five minutes. When you see the finished texture, you will see why.) Add the egg and vanilla bean paste and mix until well combined. Scrape down the sides. Add the flour mixture and mix on low speed just until the dough comes together and no streaks of flour remain.

Remove the bowl from the mixer and stir in the chocolate chips. Roll dough into a log and wrap in parchment paper. Refrigerate for at least 24 hours.

When ready to bake, pre-heat the oven to 360 degrees and line two baking sheets with parchment paper. Scoop dough onto prepared sheets and sprinkle each ball with a pinch of sea salt.

Bake for 10 to 12 minutes, rotating sheets at halfway point if cookies are not baking evenly. Cookies should be lightly golden brown but still gooey in the center. Allow cookies to cool on sheets for at least 5 minutes and then transfer to wire racks to finish cooling.

Cookies will keep in an air tight container for a few days. (Probably. I don’t know. Mine aren’t going to last long enough for me to really gauge this.)

******

* I highly recommend using a mortar and pestle to grind up the seeds from inside fresh cardamon pods. However, if you cannot be bothered and are using ground cardamon, you might want to reduce the amount to a 1/4 teaspoon.

** The original recipe recommended a combination of chopped chocolate bar and chips. I will have to try that sometime. In this instance, I only had white chocolate chips. (White chocolate can be a hard item to source for a reasonable price. I generally go to Whole Foods and buy their white chocolate chips as it is the best quality for a reasonable price I have found. And bargains are not something I generally associate Whole Foods with.)

*** If you don’t have the good flaky sea salt on hand, do not swap out regular sea salt. Go for kosher salt. You want those big grains of salt.

Wild Mushroom Butter

Here is a partial list of things that I have put this butter on: Bread, bagels, cornbread, burgers, steak, lamb, salmon, turkey, chicken, potatoes, rice, do I need to keep listing things? This butter basically goes with everything. Anything you could conceivably put butter on. Whenever I am grilling and I have some of this butter around, I put it on the table and people put in on just about everything. I once made a grilled leg of lamb and had someone declare that the rather spectacular lamb was just a vehicle for this butter. It is just that good. Drop a pat of this butter in scrambled eggs. Toss a little with some spaghetti. I have made a meal out of nothing but toast and this butter and felt like I was treating myself to something completely extravagant. (Oh, bakery fresh bread with this butter, some sauteed greens and a crispy fried egg on top is damn near a religious experience.)

And the best part is that this recipe comes together like nothing. Especially if you have a food processor to do the mushroom chopping for you. A mix of mushrooms is always good. There is a vendor at the farmer’s market here who sells a big bag of crimini, shitake, oyster and portabello mixed together and that is an awesome mix for this butter, but the mix is not necessary. You can make killer good butter with just one mushroom in the mix. The most common mushroom I have on hand is crimini and I often make it with just those and never have any regrets. (Though I do dream of the day that I finally go pick some morels and make this butter with those. Seriously, I dreamt about it once.)

I made some slight adjustments to the original, but not much. Barbara Lynch is a brilliant chef and her recipe here is on point. Since I was squeezing fresh lemon juice for this, I added a little lemon zest because why not and I use a little less salt than she calls for because I just don’t think it needs it. (For the record, she calls for a 1/2 teaspoon of salt and a 1/4 teaspoon of pepper stirred into the final mix. I say a pinch to taste.) Also, unless I am making it for a large gathering, I generally halve her recipe and the halved version is what I give you here because a gal can only eat so much butter. No, should is the word I was looking for, a gal should only eat so much butter.

Wild Mushroom Butter
(adapted from Barbara Lynch)

1 stick of butter at room temperature*
1 tablespoon olive oil
2 oz. wild mushrooms, finely chopped (about 1 cup)
1/2 small shallot, finely chopped
1/2 large clove of garlic, finely chopped**
1 teaspoon flat leaf parsley, finely chopped
1/2 teaspoon thyme leaves, finely chopped
1/4 teaspoon fresh lemon juice
1/4 teaspoon lemon zest
Sea salt***
Pepper

Heat the olive oil in a skillet over medium-high heat. Add the mushrooms and let them cook untouched for a few minutes to brown. Then add the shallots and garlic and cook, stirring frequently, until the mushrooms are richly browned, have released their liquid and that liquid has evaporated (six to eight minutes depending on the heat and the pan you are using). Remove the skillet from the heat and add a pinch of salt and pepper. Set aside to let the mushroom mixture cool.

Once the mushroom mixture has cooled, stir in the herbs, zest and lemon juice. Add the butter and mash together with a fork until thoroughly blended. Taste and add salt and pepper as and if needed then mash to incorporate. To store the butter, you can roll it into a log and wrap it in wax paper or just spread it into a dish and seal it. Butter will keep in the fridge for two weeks or the freezer for four weeks. (If freezing, definitely roll it into a log and then wrap it in plastic wrap.)

*********************************

* Never try to speed up the butter softening process. This is a place for patience. Take the butter out first and chop it into pieces. It will soften quicker in pieces than if you leave the stick whole. When a fork easily mashes through the butter, you are good to go.

** Remember that garlic mojo that I made for the guacamole in a previous post. I used a 1/2 teaspoon of that instead of chopping fresh garlic and there was definitely nothing wrong with that decision.

*** Break out the good salt for this. Maldon’s or some other fancy salt. Have you never bought a fancy salt? Buy a fancy salt and put it on everything. You only live once and you’ll learn quickly what dishes truly benefit from a high quality salt and what dishes really don’t need it. For some dishes, the quality of the salt has no impact and for some, like this one, it really does.

**** Sometimes when making this, I will double everything except the butter, stir the herbs, zest and lemon juice into the cooked mushroom mix, and then split that in half. Half gets mixed with the butter and the other half immediately gets tosses with some pasta and olive oil for a light meal.

The Best Way to Cook Tofu (without frying it)

Of course you can fry tofu and it will be delicious. Everything tastes good fried. There are things that I will only eat fried. Like okra. Or cod. And tofu is no exception to the frying rule, but I also fail to see the point of frying tofu. If I am going to fry something, I am going to fry something that will put my cholesterol levels in jeopardy. Something that is either made of pure starch or used to be alive. If I am eating tofu, it is not to satisfy that craving. If I am making tofu, I want to beam with pride after I eat for how damn healthy I am being.

This is one of the healthiest things I know how to make. Its really more valuable as a technique than a specific recipe. I recently demonstrated it to a friend who is on a super restricted diet and needed anything new to add to her cooking repertoire as long as it qualified as vegetarian, sugar free and gluten free. With one small adjustment, this meets all three qualifications. It is a method for preparing tofu that is infinitely versatile and keeps really well so you can make a big batch of it at the start of the week and then keep it in a fridge to throw in various dishes. It is a way to make moist-on-the-inside, crispy-on-the-outside tofu without frying it. (My favorite part of this recipe is that I got it from David Lebovitz, also known as the master of all things ice cream. What the hell is he doing teaching me to master tofu in his spare time? I don’t know, but if I ever meet him, I am going to thank him for doing what he could to balance my diet.)

The technique is incredibly simple and has three steps. First, you take one pound of firm tofu and press all the liquid out. You take it out of the package, drain it, wrap it in paper towels, set it on a plate, place another plate on top and set some canned goods on top. (I choose the big 24 oz. can of whole tomatoes because the weight is good and I always have some around.) Do this for 30 minutes. At the end of the half hour, the paper towels should be soaked through and the tofu fairly dry to the touch. (When I was first field testing this, I removed the soaked paper towels at the end of the 30 minutes and re-wrapped the tofu, convinced that there must be more liquid to get out, and repeated the pressing, but the next set of paper towels barely got damp. You really just need to wipe the surface moisture off the tofu after you unwrap and you are good.)

Next, you marinate the tofu. You pressed all the liquid out of the tofu so that it will then act as a sponge and soak up the marinade. First, cut the tofu in one inch cubes and then place the cubes in a large plastic bag and pour your marinade over them. Nudge the pieces around so that you get all lying flat (careful not to spill your marinade out of the bag as, ahem, you know someone might have done on the first try) and then seal the bag and put it in the fridge. The time for the marinade depends on two things – how much flavor you want and how much time you have. An hour is enough to infuse it with some flavor, two hours is better (and is what Mr. Lebovitz recommends as a minimum), overnight is what I try to do. You want to flip the bag over at least once at the halfway point, but multiple times if possible. (Obviously, if you do it overnight, you aren’t going to wake up to do this so one side will end up spending longer than the other. It’s perfectly fine. This is where the sponginess is working for you. I will often put it in the fridge before bed, flip it over in the morning as I head off to work and then cook that evening.)

The marinade is where the versatlity comes in. You can marinade it in any damn thing you want. You basically want about 3 oz. (or six tablespoons) total liquid. David Lebovitz provided an Asian marinade in the original recipe here, which is excellent. The marinade that I give you below is inspired by spring and my love of all things lemon, but really, as long as you have the right amount of marinade, do whatever you like. Just don’t increase the total amount of liquid.

After it is done marinading, remove the tofu and pat it dry. Place the tofu in a large bowl and sprinkle one tablespoon of corn starch on over the tofu. (If you need to go gluten free, use potato starch, it works just as well. And if you are gluten free and do not know about potato starch, man, get yourself a box of it.) I use a small mesh strainer to even sprinkle the starch and break up any clumps. Give the tofu a few tosses around the bowl to evenly coat. Then you spread the tofu out on a parchment paper lined baking sheet and cook for 45 minutes at 350 degrees. You want to turn the tofu every fifteen minutes. Unlike almost every other king of roasting, it is the side that is face down on the pan that does not get crispy, so flipping it a few times assures that all sides have a chance to crisp up. When the tofu is done, you can eat it as cubes, toss it with some noodles or rice, add it to a salad. The options are endless.

Go forth and make crispy baked tofu. Then beam with all the pride.

Lemony Crispy Baked Tofu
(Adapted from David Lebovitz)

1 pound firm tofu
3 tablespoons fresh lemon juice
2 tablespoons olive oil
1 tablespoon water
1 teaspoon fresh dill
1 teaspoon fresh thyme
1/2 teaspoon smoked paprika
Salt and pepper to taste
1 tablespoon corn starch (or potato starch)

Drain the tofu and wrap it in paper towels. Lay the wrapped tofu between two plates and set one to two (depending on their size) canned goods on top of the plate to weight it down. Set aside for half an hour.

Whisk together all your marinade ingredients and add salt and pepper to taste. (Probably 1/4 to 1/2 teaspoon of each.)

When tofu has finished draining, pat with dry paper towels to remove any surface moisture and then cut into one inch cubes. Put cubes in resealable bag and pour marinade over cubes. Lay bag and all cubes flat, seal bag and set in fridge to marinate at least 60 minutes, up to 24 hours. Flip bag a few times to allow both sides to marinate as evenly as possible.

When you are ready to bake the tofu, preheat oven to 350 degrees and line a baking sheet with parchment paper. Drain the tofu (marinade can be reserved to make a dipping sauce) and put cubes in a large bowl. Using a small mesh strainer, sprinkle the corn (or potato) starch over the tofu to distribute evenly. Toss cubes in bowl and spread evenly on baking sheet.

Bake tofu for 45 minutes, turning every 15 minutes so that cubes crisp evenly.

Remove for oven and serve. Leftover cubes can be stored in the fridge for three to four days.

Memorial Day grilling and my new favorite guacamole

IMG_2697_2

Depending on how well you know me, you may or may not know what it means when I tell you that I grilled yesterday. For most people, the opportunity to grill is an opportunity to dial down the complexity of the dishes and reduce everything to salt and pepper and maybe a little olive oil or marinade. Nice, clean, simple flavors with minimal effort.

I am not one of those people.

For me, the grill is where I first fell in love with cooking. The immediacy of it, the incredible number of variations on dishes, and how sometimes the whole thing goes catastrophically wrong, but hey, if the coals are still hot and you still have some ingredients laying around, all is not lost, make something else, change it up, take a risk and set that risk on fire! I love grilling and when I am planning on having people over to eat grilled things that means that the days before are filled with the serious business of preparing to execute an elaborate meal in about an hour of intense cooking time.

Those who have been in the kitchen with me to witness the prep work are often perplexed by the amount of it. But there is a reason for a lot of prep work. You are getting everything ready to come off an assembly line and be just the right temperature at the same time. And, you know, I fail at that goal most of the time, something is gonna be lukewarm, but I try and when I succeed, oh man, it is a joyous thing.

For Memorial Day this year, my dear friend Kate requested tacos. When I am making tacos, I go straight to Rick Bayless. He has a massive trove of recipes online and he creates really clean flavors. Rather than write out the recipes for all the dishes that I made, I am going to link to the recipes on his site and then let you know these turned out, and explain which things need to go into your repertory. (Especially the guacamole, which I will get into in detail.)

Here was my menu for Monday’s grill fest:

Pork al Pastor tacos
Duck Carnitas
Potatoes with Green Chiles
Mushrooms with Onions and Garlic
Rustic Jicama Salad
Mexican Rice with Plantains
Tomatillo Avocado Salsa

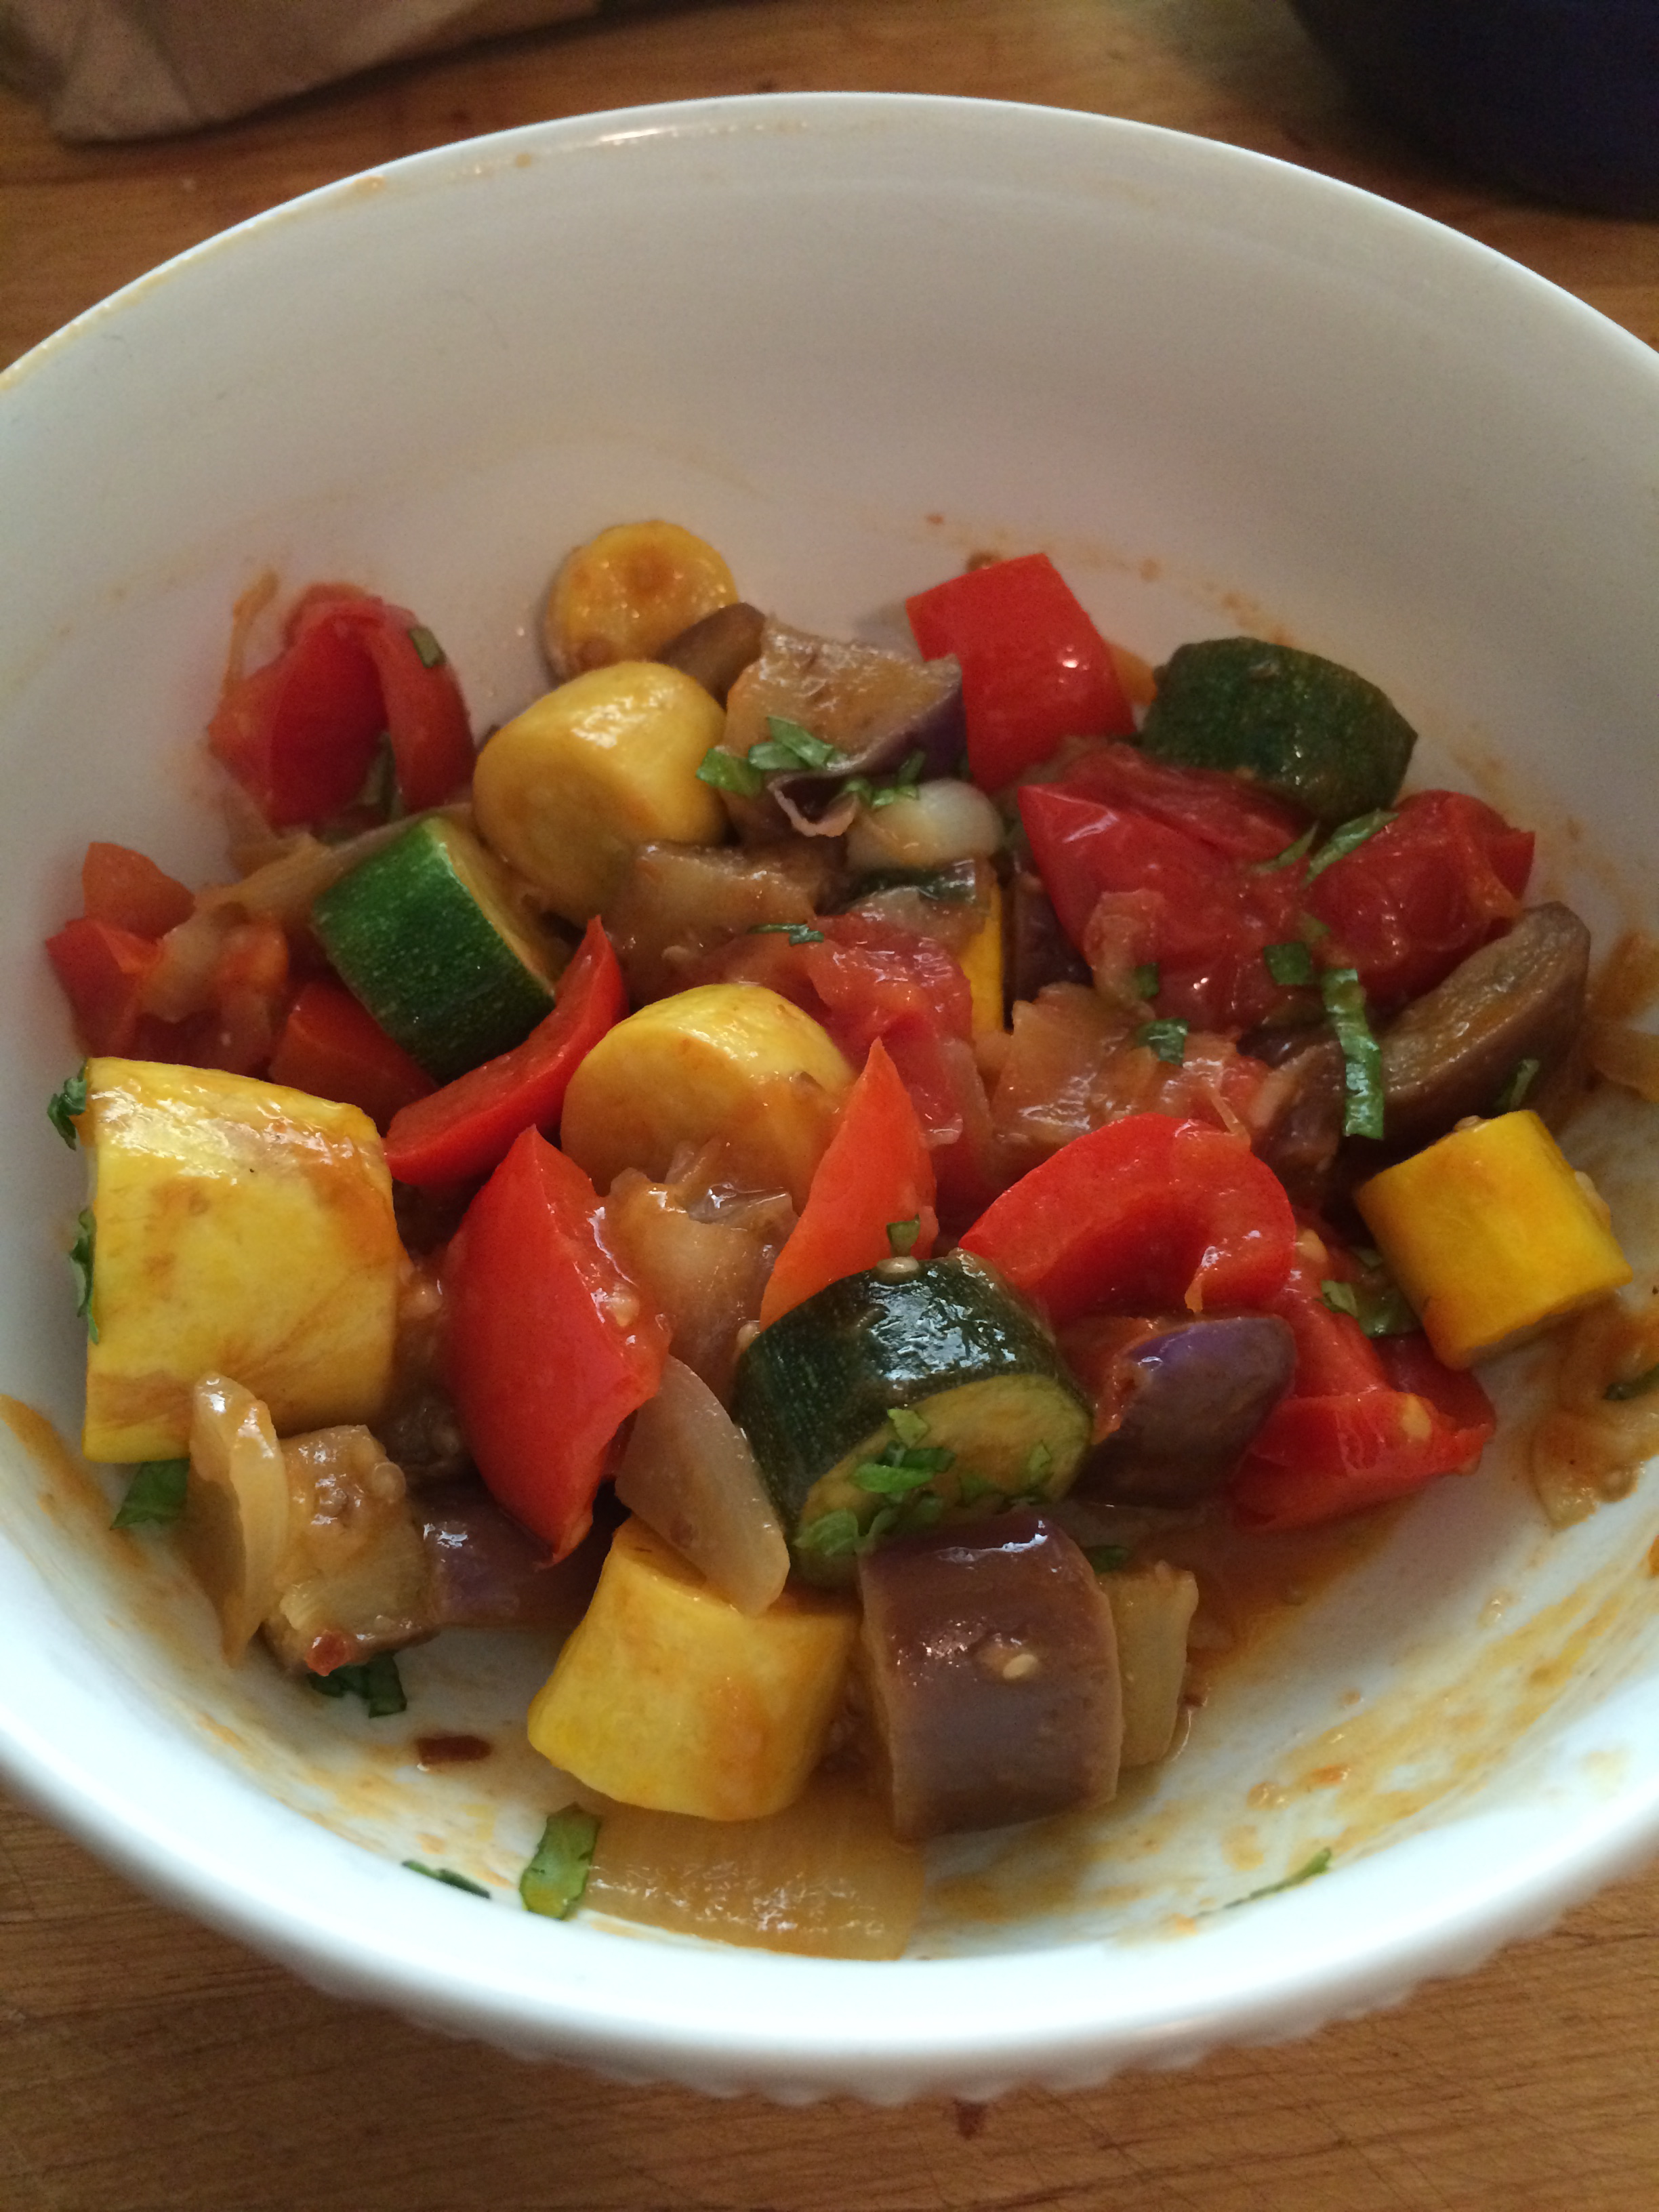
I also did a couple of random things. Some zucchini and bell peppers brushed with garlic oil and thrown on the grill. Some shredded chicken mixed with a store bought mild chile sauce.

For the various Bayless dishes:

The Pork Al Pastor is a solid recipe. This is the second time I have made it and it always turns out great. I marinate the pork in the sauce overnight. For this outing, my butcher was perplexed by my request for 1/4 inch sliced pork shoulder, insisting that it was not possible and questioning the logic of my request. He gave me 1/2 inch bone-in pork shoulder steaks and they worked fine. (Side note: It is hard not to interpret condescending butcher behavior as sexist, but I used to have a great female butcher near my old apartment and I swear that I never had to put up with this kind of crap there, and I get it all the damn time at the old school, all-male butchery that I go to on occasion. Luckily, farmers market season is starting so I can start getting my meat straight from the farmers.)

Duck Carnitas. Oh my goodness. Hard to know where to begin with this one. First of all, I had no idea carnitas were THIS bad for you. (And for those who don’t know, just don’t click on the link. Don’t ruin them for yourself.) I should have suspected because of the deliciousness, but I truly did not realize. (I had a similar reaction the first time I made frosting. “Wait, HOW MUCH sugar is in this?”) If I make this again (and oh I think I just might, arteries be damned), I will make sure to pat dry the duck skin before frying it to really crisp it up. I mean, it was amazing even though it did not crisp up much. But I always think about next time.

Potatoes with Green Chiles is another one I have made a few times now and it is just so delicious. I don’t roast the poblanos. I stick them under the broiler for about 8-10 minutes and then flip them and repeat until both sides are blackened and bubbly. Then I stick them in a ziplock bag to cool a bit and let the steam help work the skins loose. This is one of those deceptively simple dishes that packs a lot of flavor.

Mushrooms with Onions and Garlic is one that I just butchered the execution of. I was rushing. I put too much stock in and it never evaporated and got to the point that the mushrooms start frying in the lard. (I did use some of the leftover lard from the Duck Carnitas and that imparted more flavor than my execution of this dish deserved.) Nobody really ate these. But you know, as you can see, there was a lot of food.

Rustic Jicama Salad also got butchered in the execution as my rush to get it to the table completely omitted the chile powder and pickled onions, which are still sitting in my fridge looking for something to mix with. But still, one major change that I made that I highly recommend was substituting mango for the orange and then swapping out half the lime juice with orange juice. That was a great call, if I do say so myself.

Mexican Rice with Plantains was good but far from perfect. Again, I blame the execution. I started the stock simmering before I fried the plantains. The frying of the plantains took so long that I probably lost a cup of stock, which I failed to measure again before adding it to the rice. So, the texture of the rice never quite got where I wanted it to get, but it sat around for awhile and was still very edible. And I mean, come on, put fried plantains in something and you aren’t going to get many complaints. This makes a HUGE amount of rice though. I highly recommend cutting this in half. I had a large dutch oven filled to the very top with rice at the end.

Tomatillo Avocado Salsa also got a bit rushed and so the whole tomatillo and avocado pieces got blended in rather than left as chunks. Still, wow, these flavors are vivid and delicious.

All of the above pales in comparison to my two favorite discoveries of the day: Garlic Mojo and my new favorite guacamole.

Garlic Mojo is crushed garlic that is roasted in olive oil low and slow. Then you add lime juice for the last part of the roasting and mash it all up and holy sweetness. This is going to become a staple in my kitchen.

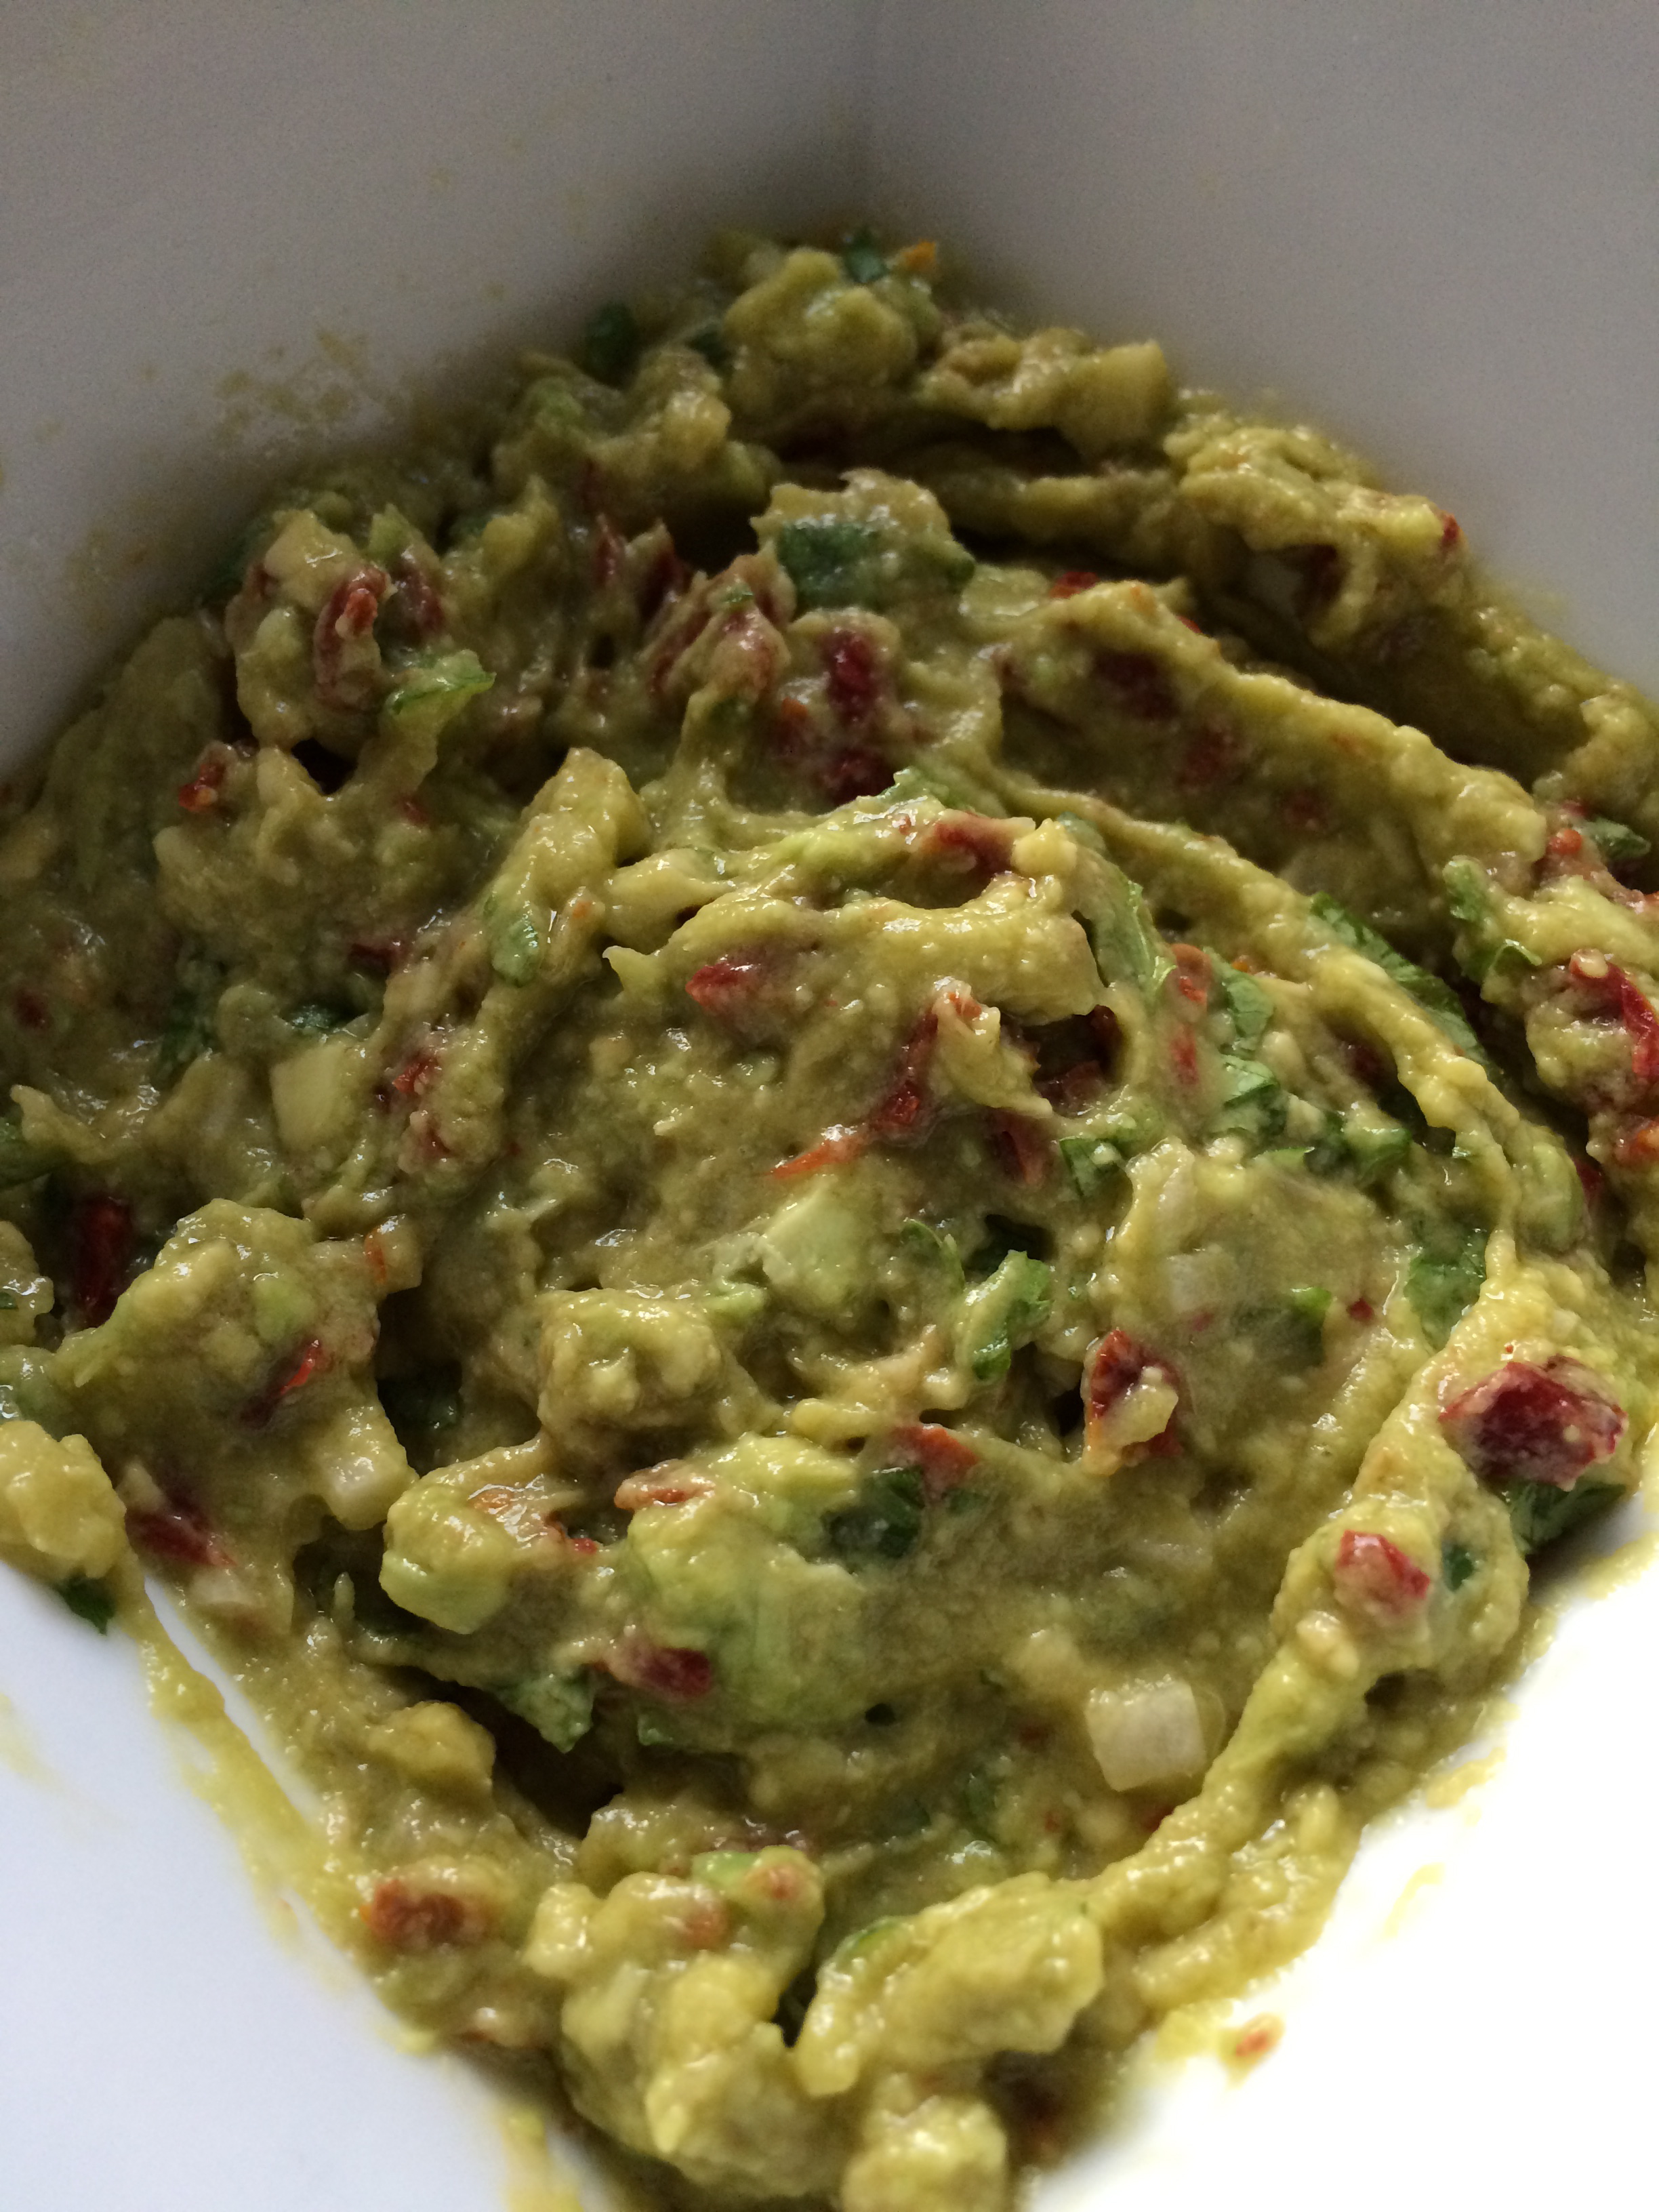
As will this guacamole. This is a pretty sweet guacamole, but I don’t mind that. I like my salsa to be hot but I have never been a fan of spicy guacamole. (I like to take alternating bites. The salsa first and then the cool of the guac.) This recipe has a lot of depth and I really enjoyed that the crunch came from little bits of jicama instead of onion, which is more common. Also, as I note below, this is an easy recipe to divide up and make a smaller portion of. Bonus!

Mojo Guacamole
(recipe by Rick Bayless)

3 ripe avocados (about 1 1/4 lbs)
1 1/2 tablespoons roasted garlic from the garlic mojo, strain away the oil
1 to 2 canned chipotle chiles en adobo, seeded and finely chopped
1/4 cup soft sun-dried tomatoes, chopped into small pieces, plus a little extra for garnish
1/4 cup jicama, chopped into small pieces
1/4 cup coarsely chopped fresh cilantro, plus a little extra for garnish
Salt (preferably smoked sea salt)
tablespoon fresh lime juice

Cut around each avocado, from top to bottom and back again, then twist the two halves apart. Scoop out the pit and discard. Scoop the flesh from the skin and add to a bowl. Add the roasted garlic, chipotles, and sun-dried tomatoes. Using a fork, mash the avocados into a coarse puree. Fold in the jicama, cilantro, 1/2 teaspoon salt and the lime juice.

Scoop the guacamole into a serving dish, sprinkle with a little chopped cilantro and sun-dried tomatoes.

NOTE: I made this for a party and it was all gone by party’s end, which made me sad. Then I looked at the proportions and realized that you could make a single serving of this guacamole by cutting everything by 1/3. One avocado, 1/2 tablespoon of mojo, 1/2 canned chile, about 2 sun-dried tomatoes, 1 heaping tablespoon of jicama (should be 1 1/3 tablespoons but my measuring spoons are not that elaborate and I was done doing math), 1 heaping tablespoon of cilantro, large pinch of salt, 1 teaspoon lime juice. A perfect snack size portion. (Pictured above.)

Garlic Mojo
(recipe by Rick Bayless)

large heads of garlic (or 10 ounces (about 1 3/4 cups) peeled garlic cloves)
cups fruity olive oil
teaspoon salt
1/2 cup fresh lime juice

Heat the oven to 325 degrees.

Mash the garlic. For garlic cloves, use the flat edge of a knife to smash out of their skins and mash all at once. For unpeeled cloves, place in a plastic bag, seal and mash using the tool of your choosing. (A rolling pin was recommended, but I found using a large cookbook and giving it a couple of good pounds with my fist to work great.)

Stir together garlic, salt and oil in an 8×8 pyrex dish. Slide into the oven and bake for 45 to 55 minutes, until garlic is soft and starting to brown. Remove from the oven and stir in the lime juice. Put the pan back in the oven for another 20 minutes until garlic is golden brown. Remove from the oven and let the oil cool slightly. (Just enough so that you don’t scald yourself if any splashes up.) Then, using a potato masher or a fork, thoroughly mash up all the garlic.

Fill a jar with the garlic and adding enough oil to submerge the garlic. (You will have extra oil. Put it to good use. I brushed vegetables with it and grilled them.) Garlic mojo will keep up to three months in the fridge as long as the oil continues to cover the garlic.

Brown Butter Cake

IMG_2650_2

Do you have a cake arsenal?

I have one. I didn’t realize that I had one until the day when I suddenly announced that I did. “I have a couple of really good cakes in my arsenal. Wait, hang on, how long have I had a cake arsenal?” Like weight gain, it is the sort of the thing that can creep up on you without your realizing it. Suddenly, you’re five pounds heavier and you’re not sure how that happened. In much the same way, one day you have a cake arsenal that seemed to just appear. (Having a cake arsenal could also have something to do with the five pounds.)

It is the sort of thing that usually develops over years. You have cakes that turn out well and get requested. I think a cake has to get made successfully at least three times before you can claim it as part of the arsenal. This brown butter cake is in the arsenal. I’ve deployed it at least half a dozen times. Unlike the other cakes in there, it is not a centerpiece. It is a simple and versatile cake that can be dressed up in a hundred different ways. Also, it is pretty easy to put together, which is always a plus.

I first encountered this cake on Top Chef. (As a rule, I am a hater of reality television, but I make an exception for Top Chef because it is amazing and it deserves it.) It was served with goat cheese cream and a blackberry sauce. When I first served it, I served it two ways: first with goat cheese ice cream and a blueberry compote, then with roasted banana ice cream and chocolate sauce. It was excellent both ways.

On Top Chef, she made it in a 9×13 pan and then used a cookie cutter to divide it up for serving. That makes for a very pretty presentation. Or it probably does, I don’t know. It did on television. I halve the recipe and make it in an 8 inch cake pan and slice it. Works fine for me.

The cake is light and full of flavor. It is a thin cake so you can really pile on the ice cream or sauce or whipped cream and fruit or whatever you feel adding. In the picture above, I am serving it with burnt cream ice cream and candied pecans. In this picture, with vanilla whipped cream and strawberries:

IMG_2653

But the thing about this cake is that dressings are just that. Extras. I often have the cake by itself with coffee in the morning and it is lovely with nothing dressing it up at all. Now that my friends is an arsenal cake.

Brown Butter Cake
(Adapted from Top Chef)

3 tablespoons unsalted butter
1 cup all purpose flour
1/2 cup sugar
1 teaspoon baking powder
1 egg white
1/8 teaspoon salt
3 oz. milk
1/4 teaspoon vanilla bean paste
1/8 teaspoon almond extract

Preheat oven to 350 degrees. Butter an 8 inch cake pan and set aside.

In a small heavy saucepan, melt the butter over medium-high heat. When melted, reduce the heat to medium-low. Don’t wander off. When the butter starts to foam, use a heatproof spatula or wooden spoon to stir the butter, keeping any browned bits from sticking to the bottom of the pan and burning. Cook until the butter has turned a nice amber color. Remove from heat and pour into a bowl. Set bowl in the freezer until butter turns solid. (Five to ten minutes. Use the time to prep the other cake ingredients.)

Sift the flour, sugar and baking powder into a bowl and set aside. (If you have the patience, sift it a few times for a finer crumb.)

In the bowl of a mixer, beat the egg white and salt until stiff. Add the browned butter, milk, vanilla bean paste and almond extract along with the flour mixture. Turn the mixer on (low for a few seconds just so the flour does not fly around and then medium speed) for approximately one minute until the batter thickens. The final batter will be tough and sticky. Spread it into the prepared pan as evenly as you can.

Bake until a tester comes out clean, 20 to 25 minutes. Cool in the pan on a wire rack for ten minutes. Then turn out and serve any way you like.