Buttermilk Fried Endives with Gremolata

IMG_2662

I am anxious about deep frying. More specifically, I am anxious about scalding myself with hot oil. I have never done it. Well, not to a staggering degree anyways, but I do fret about it whenever more than a splash of oil goes into a pan. It seems to be inviting injury or other kitchen disasters like, you know, fire. So I am usually happy to just leave the frying to the professionals. I’ll saute, I’ll roast, I’ll braise, I’ll grill like a mofo, but I’d rather not deep fry.

But then I see something like the recipe for Alice Waters’ Buttermilk Fried Endives and I know that if I go to my corner burger place, they aren’t going to make those for me. If I want to try those (and ho boy did I want to try those), I’m going to have to suck it up and make them myself. I found some pretty endives at the store and took the plunge.

Luckily, this recipe couldn’t be simpler. Cut the endives into wedges, season with salt and pepper, dip them in buttermilk and then dredge them in flour. Fry them up and eat.

So, hang on, I am basically talking about deep frying lettuce here? Yes. Yes, I am. If Alice Waters says you can do it, then you can do it. It sounds a little weird, but there is something about the eating of them that is super satisfying. They taste incredibly light for a fried thing. You almost believe you are eating something healthy. Almost. I find that they pair nicely with fish, like simple roasted tilapia or grilled sole.

You can serve them simply with some lemon wedges and just squeeze lemon juice on them or sprinkle some fresh herbs over them (which is how they are pictured above) but they also pair really well with Gremolata, which is something you should add to your recipe index even if you have no interest in the fried endives. Gremolata is a bunch of herbs and two different fruit zests (lemon and orange) combined with olive oil and left to sit for at least half an hour. You can use it accent dishes but my most common use for it is to use it to coat root vegetables (potatoes, cauliflower, parnsips, etc.) and then roast them. You get the most flavorful and succulent vegetables this way.

Buttermilk Fried Endives with Gremolata
(adapted from Alice Waters)

4 Belgian endives, cut into wedges
1 cup buttermilk
1 1/2 cups flour
Salt
Pepper
Oil for frying
Lemon wedges or Gremolata (see recipe below)

Set buttermilk in one bowl and flour in another.

Season the endives with salt and pepper.

Heat the oil to 350 degrees in a heavy bottomed pot. (If you don’t have a thermometer to gauge the temperature, I know a great trick here. Put a single kernel of popcorn in the oil. When it pops, your oil is at the right temperature. Use a slotted spoon to retrieve the popcorn kernel, eat it and start your frying!)

Dredge the endives in the buttermilk and drain. Then dredge in the flour and shake off any excess.

Fry the wedges in the oil until golden brown, two to three minutes. Set on paper towels to drain. If using gremolata, drizzle it over the wedges just before serving.

Gremolata

1/3 cup olive oil
2 tablespoons coarsely chopped flat-leaf parsley
1/2 teaspoon chopped fresh thyme
1 teaspoon chopped fresh rosemary
2 teaspoons finely grated lemon zest
1/2 teaspoon finely grated orange zest
1/2 teaspoon minced garlic
1/4 teaspoon red pepper flakes

Whisk together all ingredients in a bowl and let sit for at least 30 minutes. (I usually do it in a pyrex measuring cup because it makes pouring it onto stuff easier.)

Advertisement

Lamb Kofta

IMG_4833

I have been working on this recipe for a few weeks, which has meant that I have had outstanding leftovers in my fridge all the time. This lamb keeps so well. It tastes great cold from the fridge with nothing at all, but my neighborhood grocery store (shoutout to Morse Market in Rogers Park!) sells package of naan (Indian style flatbread) and my favorite way to eat this lamb is to take a piece of naan spreading some pesto and caramelized onion on it and then crumbling some of this lamb around and sticking it under the broiler for a few minutes. When it comes out, I sprinkle some pomegranate seeds and fresh parsley on top. (That’s how I take my leftovers. Seriously.)

There is not just one kind of Lamb Kofta. Kofta is a dish that can be found in a multitude of middle eastern and asian cuisines so you can go a lot of different ways with it. I myself have settled on two separate spice profiles, one that tilts toward South Asian and one more towards Turkish, both of which is mighty tasty and very different. I am giving you the first one. The second one is going to stay a secret. (And since it is more Turkish leaning, I think that one should be called Kofte and not Kofta. Why that one letter difference? I don’t know. If anyone does know, please educate me.)

This technique comes from The Guardian, a British publication with a really solid food section. Ottolenghi publishes a regular recipe column with them and the specific article with this recipe references his version of this dish. The basic technique here skips breadcrumbs and focuses on onion to bind the meat together. However, the onion is essentially ground to mush and then has all the water pressed out of it in a sieve to cut down on the onion flavor in the finished dish. You add a few fresh herbs and a few jarred spices as well as some ground pine nuts. Everything gets mixed together and rests in the fridge. I like to rest it overnight, but an hour is enough time to meld all the flavors.

There are three ways to cook the meatballs — you can grill them (the best way), you can pan fry them (very tasty but messy and never a fun activity in the summer), or you can stick them under the broiler for ten minutes (which works fine though you never get the even brown crust on the meat). When I grill or pan fry, I shape them into little logs. If I am sticking them under the broiler, I form small round balls.

If you cannot find ground lamb or just prefer to grind your own, you should use the shoulder cut of the lamb. And if you are grinding your own lamb, we should be friends.

Lamb Kofta
(Adapted from The Guardian)

3/4 pound of ground lamb
1 small white onion or half of a large onion, grated or processed
2 tablespoons pine nuts, ground or finely chopped
1 tablespoon parsley leaves, finely chopped
1 tablespoon mint leaves, finely chopped
3/4 teaspoon ground cinnamon
3/4 teaspoon ground allspice
1/4 teaspoon ground nutmeg
3/4 teaspoon salt
3/4 teaspoon black pepper

Make the onion and spice mixture and then add the lamb.

There are two ways to do the onion — if you have a food processor, use that to grind the onion into a mashy pulp. (I have a small one and I use it first to grind the pine nuts then I do the onion.) If you do not have a food processor, get out your box grater and use the large grates for the same result. Then put the onion into a fine mesh strainer. (If you do not have a fine mesh one, use a normal strainer lined with a little cheesecloth.) Press on the onion until all the water is squeezed out. (Then press it one more time. There is more water in there than you think there is.) Put the onion in a bowl and add the pine nuts, herbs and spices. Mix them together until the onion is evenly coated with spices. Then add the lamb and mix it all together. When dealing with meat, the less that the meat is touched by hands the better so mix it with a spoon. Cover the bowl with plastic wrap and chill for at least an hour and up to 8 hours.

Take the meat out of the fridge. Form the meat into small logs or balls. Here are the three cooking techniques.

Grilling: Lightly oil either the grate or the meat. (I never have much luck with oiling the grate so I lightly oil the meat.) Grill the meat over high heat for six to eight minutes depending on size, turning halfway through cooking so that the meat evenly browns. You want the meat to reach an internal temperature of 145 degrees for medium rare.

Pan fry: Heat two tablespoons of oil (canola or olive oil) in a frying pan. Cook the meat three to four minutes on each side until nicely browned. (Though I always end up rolling them around at the end to get more even browning.) Set on paper towels to drain.

Broiler: Pre-heat the broiler on high and line the meatballs up in a pyrex dish. Cook for ten to twelve minutes, turning halfway through cooking.


Conchiglie with Yogurt, Peas and Pine Nuts

IMG_4777[1]

Summer can be challenging for a cook. There are lots of light and refreshing salads to make but when you want a more substantial meal, you also want to find a way to make it without turning your oven on if at all possible. I discovered this recipe in Yotam Ottolenghi’s Jerusalem cookbook and thought it sounded sort of disgusting. Pasta with a lukewarm yogurt sauce? Um, maybe? I should know by now to just trust Ottolenghi.

The pasta used here is conchiglie. Conchiglie is shell pasta. (I could have just called the recipe Shell Pasta with etc. but I learned to both spell and pronounce conchiglie so we’re sticking with that.) Conchiglie is a great pasta to pair with peas and pine nuts because they are small enough to snuggle into the pasta. Ever try eating spaghetti with peas? You are basically alternating mouthfuls of pasta and peas because you cannot get them on the same fork. No such problem here.

The sauce is incredibly easy to make. You combine yogurt, olive oil, peas and garlic in a food processor and blend until smooth. You cook your pasta, throwing the peas in during the last minute to cook them. While the pasta is going, you heat olive oil in a saucepan and add chile pepper of choice with the pine nuts to toast and spice them up. Then you slowly add your cooked pasta and peas to the yogurt sauce. The spicy pine nuts get added at the end along with some fresh dill and crumbed feta. That’s it. Ottolenghi used fresh basil. I did not have any and I quite like the pairing of peas and dill so I swapped that out. He said to use any Turkish or Syrian chile flakes and I chose aleppo flakes.

Also, this is a great recipe for people who are supposed to watch their salt. Other than salting the pasta water, there is no salt added to this dish. Skip the feta at the end to lower the overall salt even more.

The sauce is creamy and delicious, plus you get a little bit of kick from the pine nuts. Perfect for a hot day. As usual, I have modified the recipe to make a single person serving, exactly one bowl of pasta. You can multiply the recipe to feed more people.

Conchiglie with Yogurt, Peas and Pine Nuts
(Adapted from Yotam Ottolenghi’s Jerusalem)

1 cup of conchiglie pasta shells
1/3 cup of fresh or frozen green peas plus one tablespoon, separated
2 tablespoons olive oil, separated
1 tablespoon pine nuts
1/4 to 3/4 teaspoon aleppo chile flakes (depending on heat preference)
1/4 cup greek yogurt
1/2 clove of garlic (or 1/4 teaspoon jarred minced garlic)
1 tablespoon fresh dill
1 tablespoon crumbled feta

Cook the pasta in well salted boiling water.

While the pasta is cooking, heat one tablespoon of olive oil in a small saucepan. When it is shimmering*, add the pine nuts and chile flakes and cook over medium heat until the nuts have browned and the oil is a deep red. Then set aside to cool.

In a food processor, combine remaining tablespoon of olive oil, one tablespoon of peas, and garlic. Puree until smooth and nicely green in color. (You may have a few chunks of pea in there. It will not hurt anything.)

Pour the sauce into a bowl and wait for the pasta to finish cooking. When the pasta has about one minute of cooking time left, add the rest of the peas to the pot. Strain the cooked pasta and peas. Add them SLOWLY to the bowl with the sauce. Too quickly and you add too much heat to fast and the sauce will separate. Mix it all together. Add the dill and feta and then sprinkle the pine nuts on top. (For even more heat, drizzle the oil from the pine nut saucepan too.)

Enjoy.

* Instructions always say to wait until the oil shimmers. I find this instruction to be a bit difficult to follow depending on the lighting in the kitchen. Rather than “shimmers”, I would suggest “slithers”. Room temperature oil moves at a slow slide, but once oil has been heated, it moves much quicker. If you pick up the pan and tilt it back and forth, you can see how the oil moves around. When it starts snaking, you’re home.

Braised Eggs with Leeks and Spinach

IMG_4751[1]

This recipe is the primary reason that I started keeping preserved lemons and za’atar stocked in my kitchen at all times. Both ingredients get used for other things, but the discovery of this is what made them permanent fixtures of the household.

I found this recipe on The Guardian website, where Ottolenghi regularly publishes a column devoted to a single ingredient. This was an eggs column. (And I am still itching to try the Eggs with Chickpeas, Tomato, and Pernod from that column. I just need to get my hands on some Pernod.)

Now, I have made a few tweaks here and there and cut down on the size of the recipe. You can crack two eggs into it instead of one and feed two people (or one really hungry person). It comes together pretty quickly. Like many Ottolenghi recipes, there are steps that seem overly fussy on the first read. Do I really need to toast and crush my own cumin seeds? Is that really worth it? Yes. Yes, it is. Is there really a difference between preserved lemon and just a regular lemon? Good grief, yes, yes there is. Does it have to be za’atar? YES.

Preserved lemon seems like a weird thing to have in your kitchen until you have it in your kitchen and then you will always find dishes to throw it in. I have heard them described elsewhere as “lemon umami” and I think its the best definition for them. It dulls the bitter edge of the lemon without sacrificing any of the lemonness. Plus, you aren’t just squeezing some juice out of it. You are chopping up the flesh and the rind. You are getting every bit of that lemon. Preserved lemon is available in stores and it isn’t too pricey, but it is also wicked easy to make yourself. You really just need organic lemons, kosher salt and a jar. Different recipes add other variables. Some throw in a little sugar. Some add black peppercorns and bay leaves. The ones that I buy from the store (when I get too lazy to make them) have a chili pepper floating in there. There is no one way to do it, but for the first outing, buy some to see what I am talking about. You will never go back.

Za’atar is a middle eastern spice that can be used in a ton of different ways. It dazzles on flatbread with some caramelized onions. It works with chicken and fish. Add it to some tahini and oil for a great dressing. In this recipe, it is whisked with a little olive oil and drizzled over the top of the finished eggs. When you see it in stores, you might see both green and red varieties. The basic za’atar is green and is comprised of thyme, sumac, sesame seeds and salt. You might also see marjoram and oregano thrown in. Some people add cumin and that gives it the red color. However, if you are going to a store that stocks sumac, then odds are that it stocks za’atar. I made my own za’atar once. There was absolutely no improvement over the storebought blend.

The easiest shortcut in this recipe is to skip toasting and crushing the cumin seeds and just use ground cumin but I think the toasted cumin really sings here. I also love the excuse to use my mortar and pestle, which I really struggle to find uses for sometimes.

Also, can I just take a moment to wonder exactly how leeks are the single dirtiest vegetable ever. When you slice into them, almost every inner ring has dirt in it. All other vegetables are made to look supermarket pretty when we see them at stores, but not leeks. Leeks hold fast and firm, demanding that you see the earth that they came from. They will not be made pretty for you. (Okay, I may have gone a little around the bend with that thought. Let’s go back to the recipe.)

Ottolenghi recommends sauteing the leeks in butter and olive oil and I choose to omit the butter. He also does not use aleppo chile pepper but I always have that next to the stove so it tends to find its way into a lot of dishes that did not call for its presence. I like the flavor and I like the color it adds.

For the stock, you can easily substitute vegetable stock. And if you have no stock on hand, a half cup of water with a good chug of white wine vinegar will get the job done, but you will lose some flavor.

You want to have some good bread to eat this with. I ate this sitting in my backyard, which I include a picture of just because my backyard is really pretty. (I can claim no credit for that. Its a shared deck and my neighbor does all the pretty things. But boy do I enjoy the benefits of her labor.) Also, this photo highlights the mysterious speed bump on my back deck. Why are you there, speed bump?

IMG_4760[1]

Braised Eggs with Leeks and Spinach
(adapted from Yotam Ottolenghi’s Guardian column)

1/4 tsp cumin seeds, toasted and crushed (or a 1/4 tsp ground cumin)
2 tbsp olive oil, separated (plus more as needed)
1 large leek (or 2-4 smaller leeks), trimmed and sliced
1/4 preserved lemon, seeds discarded, skin and flesh finely chopped
1/2 cup unsalted chicken stock
2 cups baby spinach leaves
1 egg
1 tbsp crumbled feta
1/4 tsp aleppo chile pepper
Salt and pepper to taste
1 tsp za’atar

In a small pan, toast the cumin seeds over medium heat until they are lightly browned, about three to five minutes. Then grind the toasted seeds in a mortar and pestle until they are finely ground. Set aside.

Heat one tablespoon of olive oil in a large saute pan over medium-high heat. Add the leaks and salt and pepper to taste. Cook, stirring occasionally, until leeks have softened, about five minutes. Then add the chopped lemon (juice, flesh and rind) and ground cumin and stir for a minute. Add the stock and simmer for five minutes, until most of the liquid has evaporated.

IMG_4738[1]

Add the spinach and fold it in until the spinach has just wilted. Then make a hole in the center of the mixture (or two holes if doing two eggs) and crack your egg into the hole. (I usually add a splash of stock to the pan, around the edge of my pile of greens, just to keep them from sticking to the pan.) Sprinkle feta and aleppo over the top and cover. Cook for four to five minutes.

While the egg is cooking, take a small bowl and whisk together the za’atar and the remaining tablespoon of olive oil until well blended.

IMG_4747[1]

Remove the lid and look at the beautiful thing you have made. Scoop into a bowl (spatula is a handy tool for doing this without jeopardizing the integrity of the yolk) and then drizzle with the za’atar oil. Eat immediately with toasted bread.

Arugula Baked Eggs with Yogurt and Crispy Sage Leaves

IMG_4700

As a single person, one of the things that I find constantly aggravating about recipes is that they are all built for at least two but usually four people. Which means that if I am going to make a one-person version of a dish, then there is math involved and math just infuriates me because I am bad at it. So I really appreciate a dish that is flexible in portion size. You can make a little or a lot without a whole lot of adding or subtracting or, horror of horror, dividing of fractions.

The first time that I made the Baked Eggs with Yogurt and Chile from Yotam Ottolenghi’s Plenty cookbook, I made the full portion size and it was definitely more food than I needed for breakfast that day, but the basic concept seemed easy enough to modify and scale up and down, which is what I have done here. I am laying out how much of each thing you need to cook a single egg with this preparation. You can multiple the items for multiple eggs, or just make yourself a nice light breakfast.

The basic idea is to use some lightly sauteed arugula as a bed for a slow baked egg and then top that with a dollop of yogurt and some spicy fried sage leaves. It all gets mixed together and you have the bitterness of the arugula with the richness of the egg and the tart yogurt to balance out the spiced up sage. I eat it with some whole wheat toast. I actually use my toast as the spoon.

I made a couple of small changes to Ottolenghi’s recipe. First, he suggests that you cook the arugula in olive oil and butter. I substitute in some coconut oil because I wanted to take the overall butter content down in this dish. There is butter to finish it off so I never miss it. Second, he adds garlic to his yogurt topper. This is a lovely addition that I always think I am going to do but then it is time to mince garlic and I always say screw it. I don’t miss it. Third, he uses Kirmizi Biber as the spice with his sage and butter. Its not something that I keep in my kitchen and my local spice shop does not carry it so I substitute in Aleppo Chile Pepper here (which is a fantastic addition to any spice rack and I highly recommend adding it if you do not have it).

I do the arugula sauteing and sage leaf frying in a small saucepan, but I bake the egg in a ramekin. If you don’t have a ramekin and are thinking that means that you don’t have any single serving size vessel that can go into the oven, check your coffee mugs. Many mugs are oven safe and can totally do the job here, especially since we aren’t cooking at a very high temperature. Check the bottoms of your mugs to see if you have one that is oven safe.

IMG_4703

Arugula Baked Eggs with Yogurt and Crispy Sage Leaves
(Adapted from Plenty by Yotam Ottolenghi)

Coconut oil (or olive oil) to taste
2 cups of arugula
1 large egg
1/2 tablespoon butter
1/4 – 1/2 teaspoon chile pepper (kirmizi biber, aleppo flakes, or crushed red pepper with a pinch of sweet paprika)
3 fresh sage leaves
1 tablespoon yogurt
Salt and pepper to taste
Optional: feta cheese, garlic, whole wheat toast

Pre-heat oven to 300 degrees.

In a small pan, heat a tablespoon of olive oil over medium heat until just warm and add the arugula with a little salt and pepper, stirring until the arugula wilts and releases its water. (This will take about five minutes and you can always press down on the arugula with your spoon to heat it release the water.) Pile the arugula into a small oven safe dish (ramekin is ideal) and make a hole in the center of the pile. Crack your egg into the center. Sprinkle a little salt on top. (You can also sprinkle a little feta and some of your chosen chile pepper on top if you feel that way inclined.) Place on the center shelf of the oven and cook for 10 to 15 minutes until the egg white is  set.

While the egg is cooking, wipe out the small pan and heat the butter. Once it is melted, add the chile pepper and cook for two to three minutes until the butter takes on a nice red color. Add the sage leaves and fry for one to two minutes until crispy. Set aside.

Optional: You can mince a clove of fresh garlic and add to the yogurt with a pinch of salt.

When the egg is finished cooking, add the yogurt and sage leaves. You can eat as it is or with toast.

FOLLOW UP QUESTION: How am I supposed to eat this?

I am astounded by the number of times that I follow a recipe to the letter, sit down to a beautiful finished dish and I am left wondering, um, how exactly should I be eating this? Do I eat it with a fork? With a spoon? Do I eat one thing at a time or lump it all together?  Why aren’t there eating instructions? I was faced with this very dilemma the first time that I made this dish. It looked lovely, but I spent several minutes poking it with my fork before I ventured in. What I have discovered after making this several times is that you take a fork and mash it all together so that you have something like this:

IMG_4705

Then, you take some toast and pile the arugula on the toast and eat it. You can eat it without the toast, but I find that the texture of the toast rounds the dish off nicely and helps turn a single ramekin into a nice full meal.

Rhubarb Pie

13310508_10206470034656678_5646657044725003348_n

Hey there. Its been awhile. I sort of fell out of love with this blog for a bit. Or maybe I just reached my cake threshold. Read back and you will see that there was an appalling amount of cake just before the blog went on extended hiatus. (Oh, you think there is no such thing as too much cake?  Trust me, there is.)

But yesterday was the first grilling day of the year and I am inspired to post a little about this pie that I made because it is a thing of beauty. I served it with two kinds of homemade ice cream (honey and caramel) and several people commented that they wished they had skipped the ice cream but it was interfering with the pie. This pie stands on its own.

The recipe is adapted from Martha Stewart. It features an all butter crust and a simple crumble. Martha’s recipe (and yes, I call her Martha, because she and I go back) differs in execution from mine in one dramatic way. When you make the rhubarb filling for the pie, she instructs you to use a cup of sugar along with two tablespoons of corn starch, toss and then “pour” into the pie plate. I don’t pour. I lift the rhubarb out a handful at a time. This results in a mixing bowl with most of that cup of sugar still sitting in the bottom of the bowl. GOOD. Leave it there. What you have done is given your rhubarb a dusting of sugar. Rhubarb is not a wet fruit so only a bit of the sugar will be accounted for in the final product. (Though the crumble has some sugar in it, so you still get a bit of sweet.) But the result here is that the rhubarb stays tart. It retains its rhubarb-ness.

I think I am going to try to do a post a week this summer, but I’ll be focusing more on vegetables and exploring more of Yotam Ottlenghi’s cookbooks. (He has been my obsession lately. For next week’s post, I may revisit a cauliflower salad of his that I made yesterday.) So, happy summer. Come here to see what I’m cooking.

Rhubarb Pie
(Adapted from Martha Stewart)

Pie Dough

2 1/2 cups all-purpose flour
1 teaspoon sugar
1/2 teaspoon fine salt
2 sticks cold unsalted butter, cut into pieces
1/2 cup ice water

Combine the dry ingredients in the bowl of a food processor and pulse to combine. Add the butter and pulse until the mixture resembles coarse sand. Begin adding the water a tablespoon at a time until the dough can be loosely packed together.

ONE CRUST OR TWO: You can go one of two ways here. Divide the dough into two balls and use one of them for the crust or make one giant ball for an extra thick crust. I chose the latter option and I highly recommend it. Rhubarb is a heavy fruit. Even the thick crust has trouble standing up to it.

Wrap the dough in plastic wrap and refrigerate for at least an hour, up to 2 days.

When you are ready to bake your pie, roll the dough out to a 14 inch diameter and spread over the pie plate. Using kitchen shears, trim so you have one inch of dough hanging over the sides of the plate. (If you are like me and cannot get pie dough to form a circle for the life of you and so always have one little spot where no overhang is happening, you can use the trimmings and sort of tack it on.) Crimp the edges and refrigerate the plated crust for one hour.

CRIMPING: It has taken me many pies to get the crimping thing down and I am sure that my technique can be further improved upon. At present, I take my overhang of dough and fold it up so that I have a thick layer of dough around the edges. Then I use my pointer and middle finger, with a little space between, and press to form two little indents. I then move the fingers one over, so the pointer rests where the ring finger was and repeat. I do this all the way around. The result is pictured above.

Crumble

3/4 cup all purpose flour
1/3 cup light brown sugar, packed
3 tablespoons granulated sugar
Pinch of salt
6 tablespoons cold unsalted butter, cut into pieces

While the pie crust is chilling, make your crumble.

Combine the dry ingredients and stir well. Use your hands to work the butter in. Press the butter between your fingers to smash it all together. Once it is well combined, cover and chill until ready to bake.

Pie Filling

1 3/4 pounds of rhubarb (about six stalks)
1 cup granulated white sugar
2 tablespoons cornstarch
Flour for dusting

When you are ready to bake your pie, preheat your oven to 400 degrees.

Trim the ends off of the rhubarb and cut the stalks into even pieces. (Pieces should be 1/2 inch to 1 inch, depending on the thickness of the stalk. I had a mix of very thick stalks and thinner stalks, so the thicker stalks were cut into 1/2 inch pieces and the thinner stalks were closer to an inch.) You should have about six cups of rhubarb. (I used my digital scale to confirm that I was still right around 1 3/4 pounds instead of using a measuring cup. I have kitchen anxiety if I ever have to measure out more than five cups of anything. I am convinced that I am going to get distracted and lose count and have to start over.)

Toss the rhubarb with sugar and cornstarch.

NOTE: Do you need the whole cup of sugar for the tossing? I think so. You want enough for the even dusting. Almost the entire cup will get thrown out. Its a bit wasteful. You can experiment with using less sugar and see how it goes. I did not.

Remove your pie crust from the fridge. Take handful of the rhubarb and dump into the crust. (Remember, there will be sugar left in the bowl. Maybe a lot of sugar. Leave it there.) When all the rhubarb is in, sprinkle the crumble over the top. It will fall into the crevices here and there. Place the pie plate on a foil lined baking sheet and put into your pre-heated oven. Immediately turn the temperature down to 375 degrees.

Bake for 1 1/2 hours. (Check periodically to make sure that the crust and crumble are not browning too quickly. If they look pretty brown at the one hour mark, you should tent with foil for the remainder of the cooking period.)

Cool pie completely before serving (with or without ice cream).

Apple Tart Cake

IMG_9062

This is a perfect cake for this time of year. As August draws to a close, the markets start to flood with apples. Apple cakes have a tendency to be dense, saturated with butter or caramel, too heavy for the weather. Not this cake. This cake is light as a feather.

You make a very basic tart-like dough in the food processor. It gets pressed into a springform pan but not tightly. Press it too tightly and you will have a nice crispy exterior with very little cake within it. Pressed lightly and the outside develops a nice crust while the inside has a nice thin layer of fluffy cake.

Then the apples. The apples are where the work comes in to this cake. First, the apples are peeled, halved, cored and sliced as thin as you can get them. Then they are set standing atop the dough in a circular pattern. I tend to vary my patterns a little bit, but on this occasion I started by gathering five or six apple slices and setting them at regular intervals around the pan.

IMG_8973

I then started adding more sliced apples to fill in the gaps. Once all the gaps were filled, I took the remaining slices and cut those in half to more easily squeeze every last one into the pan. You want to fill every nook and cranny.

IMG_8975

The majority of the baking is done with just the dough and apples. This allows the dough to seal before any liquid is added and it allows the apples to retain their structure. After 45 minutes of baking, the cake is taken out and a simple butter, sugar, cinnamon and egg mixture is spooned over the top. It cooks for another 20 minutes until the topping is just set. It takes a while to cool and it greatly benefits from being made a day in advance so the flavors can all settle.

The end result is just lovely. Every element separate and distinct but all in harmony. It takes a little bit of work to make it happen, but it is totally worth it.

Apple Tart Cake
(Adapted from Orangette)

For cake:
3/4 cup granulated sugar
1 cup all-purpose flour
1 tsp. baking powder
5 Tbsp. cold unsalted butter, cut into a few pieces
1 tsp. vanilla extract
1 large egg
3 large tart apples, peeled, cored, and sliced very thinly

For topping:
3 Tbsp. granulated sugar
3 Tbsp. unsalted butter, melted and cooled slightly
1 tsp. ground cinnamon
1 large egg

Preheat oven to 350°. Butter and flour an 8-inch springform pan.

In a small bowl, beat the egg and add the vanilla to it. Set aside.

In the bowl of a food processor, combine the flour, sugar and baking powder and pulse to mix. Add the butter and pulse until no large lumps remain. Add the egg-vanilla mixture and blend until well combined. Take the dough and lightly press it into the bottom of the springform pan, letting it creep up the sides an inch or so. (Do not tightly compact the dough.)

Now arrange the apples in a circular pattern atop the dough. Squeeze in as many as will fit and then squeeze in a few more until you literally cannot fit another apple slice in there. Slide the pan into the oven and bake for 45 minutes.

When the 45 minutes is almost up, make the topping.*

Remove the cake from the oven and spoon the topping evenly over the cake. Put the cake back in the oven for 20 to 25 minutes until the topping is set.

Remove the cake and set to cool on a rack for 20 minutes. Then run a knife along the edge and remove the sides of the springform pan. Let the cake finish cooling.

The cake is best the next day so once it is cool, cover tightly and store at room temperature until the following day. Then serve with some vanilla ice cream.

****************

* If you want to make the topping right after the cake goes in, you can go ahead and melt the butter and add the sugar and cinnamon but wait until the last minute to add the egg. Sugar will change the structure of the egg if it is left to sit. I would recommend sitting the melted butter-sugar-cinnamon mixture on top of the warm oven while the cake bakes to keep it fluid. Then mix in the egg at the last minute.

My favorite pear cake (or fixing things that are not broken)

IMG_8890

Talking to my mom earlier, I told her about the cake that I was baking. She said, “Oh, cake, what’s the occasion?” There was a pause and I responded, “Well, there were pears at the market and they were pretty. So now there is cake.”

As I write this, I am still waiting for the cake to cool so I will have to report back on the final results later, but today I took one of my very favorite cake recipes and changed a bunch of things. Nothing major. The bones are still there. I just made a few small tweaks.

This recipe for Bittersweet Chocolate Pear Cake comes by way of Smitten Kitchen, easily the best of all the home cooking blogs. You take a few eggs and whip them into oblivion. You add a little sugar and white some more. Then you add a basic flour-baking powder-salt mixture and browned butter (hooray) in alternating measures. You pour it into a springform cake pan and sprinkle diced pear and chocolate chunks on top. Here is what it looks like just before it goes into the oven:

IMG_8875

It takes about 40 minutes in the oven. I have made it many times, occasionally as a birthday cake and it is always greeted with enthusiasm. Today, however, I made three small adjustments.

First, I swapped out the 3/4 cup of bittersweet chocolate for 1/2 cup white chocolate and 1/4 cup dark chocolate. This was not so much a decision born of inspiration as a decision born of the contents of my chocolate drawer. (Wait, let us pause so I can explain the chocolate drawer. It is not as weird as it sounds. I have a big butchers block in my kitchen. It has two doors concealing a shelved spaced where pots and pans are stacked precariously as well as three smallish drawers. One of these drawers houses various kitchen doodads. One houses all my Indian spices. And the third and top drawer is the chocolate drawer. When you bake a lot, you end up with a lot of chocolate. Cocoa, baking chocolate, unsweetened, semi sweet, milk, dark, white, some in bar form and some chip form. It easily fills a drawer. Plus I get to reference my chocolate drawer, which delights me no end. End of pause.) So, with no bittersweet in sight but a half bar of high quality white chocolate and a handful of dark chocolate chips staring at me, the decision was an easy one.

The second adjustment was replacing all purpose flour with cake flour. I wanted a finer crumb here. And this is an easy switch to make. For every cup of flour, you use one cup plus two tablespoons of cake flour.

The last was born of the fact that I always miss a little hint of vanilla when tasting this cake but never wanted to add it the delicate alchemy of wet ingredients at work here for fear of screwing something up. Then it hit me. The diced pears! Before I started on the eggs and butter, I diced the pears and drizzled 1/2 teaspoon of vanilla bean paste over them, tossing them to coat them.

The baking of the cake hit a small snag. I shook the pan a little to check doneness. It was still wobbly in the center and my shaking instantly deflated the center. Ugh, this is such a rookie mistake on my part. You never shake the pan. The cake should still taste lovely though. It just has a little dip in the center.

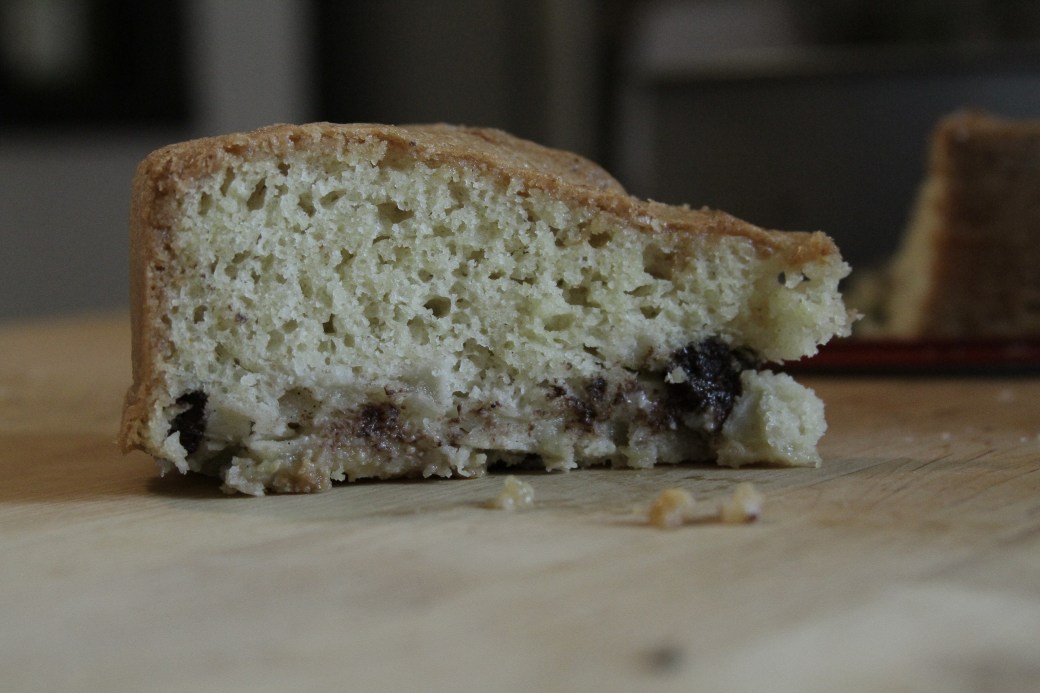
UPDATE: And I can report that the cake’s flavor was in no way lessened by the slight dip in the center. This pear cake was delicious. The cake flour produced a much more tender crumb. The white and dark chocolate result in a cake that is less sweet and more layer upon layer of flavor. Also, the vanilla glazed pears were just lovely. Not sure why everything sank all the way to the bottom rather than being dotted throughout the batter, but it worked just fine for me.

IMG_8902

Chocolate Pear Cake
(Adapted from Smitten Kitchen)

1 cup plus 2 tablespoons cake flour
1 tablespoon baking powder
1/4 teaspoon salt
3 eggs, at room-temperature
4 ounces (1 stick) unsalted butter
3/4 cup white sugar
3 pears, peeled, in a small dice
1/2 teaspoon vanilla bean paste
1/2 cup white chocolate chunks
1/4 cup dark chocolate chunks

Preheat oven to 350 degrees. Butter and flour an 8 inch springform cake pan* and set aside.

Sift the flour, baking powder and salt into a small bowl and set aside.

Place the diced pears in a bowl, drizzle with the vanilla bean paste, and then toss to coat them. Set aside.

Now, make the browned butter. Melt the butter in a small saucepan over medium high heat, stirring pretty regularly (though not constantly). As the butter solids begin to brown, scrape the browned bits off the bottom of the pan. When butter has achieved a nice color (think that warm brown that has the tiniest hint of red in it, not quite amber but approaching it), pour off into another container and set aside. (If you leave the butter in a hot saucepan, it will keep cooking the butter even if you take it off the heat and you will risk burning it. So pouring it off is your best bet. Make sure to set aside somewhere warm so the butter does not solidify.)

Place the eggs in the bowl of a standing mixer and, using the whisk attachment, whip the eggs on high speed for five to ten minutes (depending on your mixer, a professional mixer can get it done in five, my mixer took ten) until the eggs are thick, custardy and doubled in size. Add the sugar and beat for a few more minutes.**

Now switch out the whisk attachment for the paddle attachment. With the mixer on stir speed, add the flour mixture and butter in alternating measures (1/3 flour mixture then 1/2 butter then 1/3 flour mixture then 1/2 butter then 1/3 flour mixture). As soon as the last flour mixture is incorporated, stop the mixer and pour the batter into the prepared pan.

Sprinkle the pears and the chocolate*** over the top. They will sink into the batter (if not immediately then certainly during baking).

Bake the cake for about 40 minutes until the top is golden brown and springs back to the touch. Cool on a rack and then serve with whipped cream or ice cream.

****************

* Most springform pans are 9 inches and that is fine to use here. I like the 8 inch because it results in a slightly higher cake that is still sizable enough to cut up and serve to a roomful of people.

** Make sure you do not let the eggs and sugar sit after being combined. You never want to let eggs and sugar sit together unless the recipe is specifically instructing you to do so. You may heard the expression that sugar can “cook” eggs. This isn’t technically true. Only heat can cook eggs But what sugar can do is absorb the water naturally present in eggs and cause the egg proteins to coagulate and clump together. (Salt can do this too.) So, letting eggs and sugar sit changes the structure of the eggs.  (A few minutes is fine, but don’t walk away from them for too long.)

*** The original recipe called for a 3/4 cup of bittersweet chocolate. I quite liked swapping this out for dark and white chocolate, though I might switch the ratio next time and do a half cup dark chocolate and a quarter cup white chocolate.

Funny Cake (aka cake inside a pie crust)

IMG_8693

I don’t remember how I first came across a recipe for Funny Cake, but I remember my reaction. “Wait, there is a way to bake a cake inside of a pie crust? And I have never done it?!?”

Very un-thorough research on the internet tells me that this is a classic Pennsylvania Dutch recipe for a breakfast dish. It also tells me that the Pennsylvania Dutch were Germans and were named “Dutch” because people thought that was their language when they said they spoke “Deustch”. These must be a remarkably easygoing people. This is the large-scale equivalent of telling someone that you are Bob from Dallas and that person then introduces you as a man named Dallas and you never correct him and everyone calls you Dallas forever and you just answer to it because, eh, it’s fine.

But back to the cake/pie. It really is the simplest thing ever and I have made it several times and EVERY SINGLE TIME I think I have screwed something up and it didn’t work. Literally, every time. But it does work and it is cool thing to watch if you are the sort of person who sits in front of their oven and watches something bake start to finish just to see what happens. (What? Sometimes its really cool!)

Here is the basic idea: You take an unbaked pie crust, fill it with cake batter and then pour a simple fudge sauce over the top of the cake batter. While baking the fudge sauce seeps down into the space between the cake and the crust, leaving streaks of fudge prettily over the top and creating this lovely layer of fudge between the pie crust and the cake. And it works! (Which doesn’t mean that I don’t recommend using a store bought crust for at least your first one. Don’t waste a homemade crust on your first attempt.)

It’s a fun combination. Unusual and, in my opinion, a little too sweet for breakfast but I have a friend who has requested this as his birthday cake on multiple occasions. It never disappoints and people are always delighted by the fact of it, as am I. It is also super easy to multiply the ingredients and make two or three of these at once. (Just saying, if making one for someone else and one for yourself at the same time is an easy thing to do, then it warrants consideration.)

Funny Cake

1 unbaked 9 inch pie crust
1 1/4 cups sugar, separated into 3/4 cup and 1/2 cup
1/4 cup vegetable oil
1 large egg, room temperature
1 cup all purpose flour
1 teaspoon baking powder
1/2 cup whole milk
1/2 teaspoon vanilla extract
1/4 cup cocoa
1/2 cup hot water

Pre-heat oven to 350 degrees.

First, make your favorite pie crust. Roll it out, press it into a pie tin and put it in the fridge until you are ready to fill it.

Mix together the flour and baking powder in one bowl and set aside. Measure out the milk and pour the vanilla into it and set aside.

In the bowl of a standing mixer, combine 3/4 cup of the sugar, the oil and the egg. Beat on medium-high speed until well combined, about three minutes. Reduce the speed to low and add half the flour mixture. Mix until incorporated and then add the milk and mix until incorporated. Add the remaining flour and mix until no streaks remain. Do not overmix. Pour cake batter into pie crust and spread it evenly.

Make your fudge sauce by combining the remaining 1/2 cup of sugar with the cocoa and hot water. Whisk until smooth. Sauce will be quite runny. Pour sauce over the cake batter.**

Place the cake/pie on a baking sheet to catch any dripping sauce or cake batter. Bake for 30-40 minutes until a tester inserted in the center comes out clean. (The baking time will vary dramatically depending on the oven so keep a close eye on it the first time that you bake it.)

Place on a rack to cool. Cake will keep for a few days at room temperature and longer in the fridge.

***************************

** It is this part, the fudge part, that always makes me think I screwed it up. To my eye, the fudge sauce always looks too runny and the fact that it just sits on top of the batter as you put it in the oven always makes me think it will not seep down to form that nice bottom layer. But it always does.

PHOTO NOTE: No one will care about this but me, but I am hugely disappointed in all my photos of this cake. I felt compelled to include one because I thought the visual was important here, but man, what a crap photo. It was overcast that day and I just couldn’t get the light I needed. I may update this photo later. Which may mean baking this cake again. Sigh. My life is so hard.

Apple Fritters

IMG_2819

I thought apple fritters would be harder than this.

I mean, really, shouldn’t they be harder than this? Don’t they look hard? But no, super easy. Every ingredient is something that I have readily available in my kitchen. The batter comes together in less than 15 minutes, and that includes the time it takes to peel and cut up the apples. Frying them all took maybe 20 minutes, since you do have do multiple batches. (I imagine if I owned a proper fryer than it would be even quicker, but a fryer has never been on my list of kitchen wants.) But really, one two three and poof, done. Dusted them with a little powdered sugar and served.

And these are absolutely scrumptious. The texture is great. The ratio of apples to dough is on point. And did I mention how easy and quick they were? Simple, tasty things that can be quickly whipped up for a crowd. What more can you ask for?

This is a recipe that I am excited to play around with more in the future. There is so much room for variation here. Playing with different kinds of flour to maybe up the yeast quotient a bit. Adding various spices to the dry ingredients. I’m thinking a little clove might be nice. Adding some cinnamon to the powdered sugar. I don’t want to screw up something that is solid without being fussy, but there is room for fun to be had here.

Apple Fritters
(from Martha Stewart Living)

2 cups all purpose flour
1/4 cup plus 2 tablespoons (or 6 tablespoons) of granulated sugar
2 1/4 teaspoons baking powder
1 teaspoon kosher salt
3/4 cup whole milk
2 large eggs room temperature
2 tablespoons melted unsalted butter
1/2 teaspoon pure vanilla extract
2 sweet apples, peeled, cored and cut into 1/4 inch pieces
Safflower oil for frying
Confectioner’s sugar for dusting

Whisk the dry ingredients (flour, sugar, baking powder, salt) together in one bowl and the wet ingredients (milk, eggs, butter, vanilla) together in another bowl. Gently fold wet mixture into dry mixture until no streaks remain. Then fold in apple pieces.

Heat two inches of oil in a heavy bottomed pot over medium heat until a thermometer registers 350 degrees. Set a wire rack over a baking sheet. (I put a paper towel under the wire rack to absorb any dripping oil and make clean up easier.)

Using a small ice cream or cookie scoop (or a tablespoon if you have neither), drop balls of dough into the oil. Cook, turning once, 3 to 4 minutes. Remove with a slotted spoon and transfer to wire rack to cool slightly.

Once cool enough to handle, dust with confectioners sugar and serve warm.